If you’re craving a rich, creamy, and utterly delightful frozen treat but need to avoid coconut and nuts, this Vegan Chocolate Ice Cream (No Coconut & Nut-Free) Recipe will quickly become your new favorite indulgence. Made from wholesome plant-based ingredients like soy milk and soy cream, this ice cream manages to deliver that luxurious texture and deep chocolate flavor you expect from traditional ice cream—without compromising your dietary needs. Plus, it’s easy to make at home and perfect for sharing with friends or enjoying as a personal reward on any day.
Ingredients You’ll Need
This recipe calls for simple, accessible ingredients that each play a vital role in building creamy texture, balanced sweetness, and rich chocolate taste. Every item has been carefully chosen to ensure the ice cream stays smooth and luscious without coconut or nut derivatives.
- Unsweetened soy milk: Provides a creamy base with a neutral flavor that’s perfect for ice cream.
- Caster sugar: Dissolves easily to sweeten and help create a smooth texture.
- Sea salt: Enhances all the flavors and balances the sweetness beautifully.
- Soy cream: Adds richness and a velvety mouthfeel usually offered by dairy cream.
- Oat milk: Lightly thins the mixture and adds subtle sweetness; you can swap with any plant milk.
- Vanilla extract: Brings warmth and depth to the overall flavor profile.
- Dutch-processed cocoa powder: Gives that deep, smooth chocolate taste without bitterness.
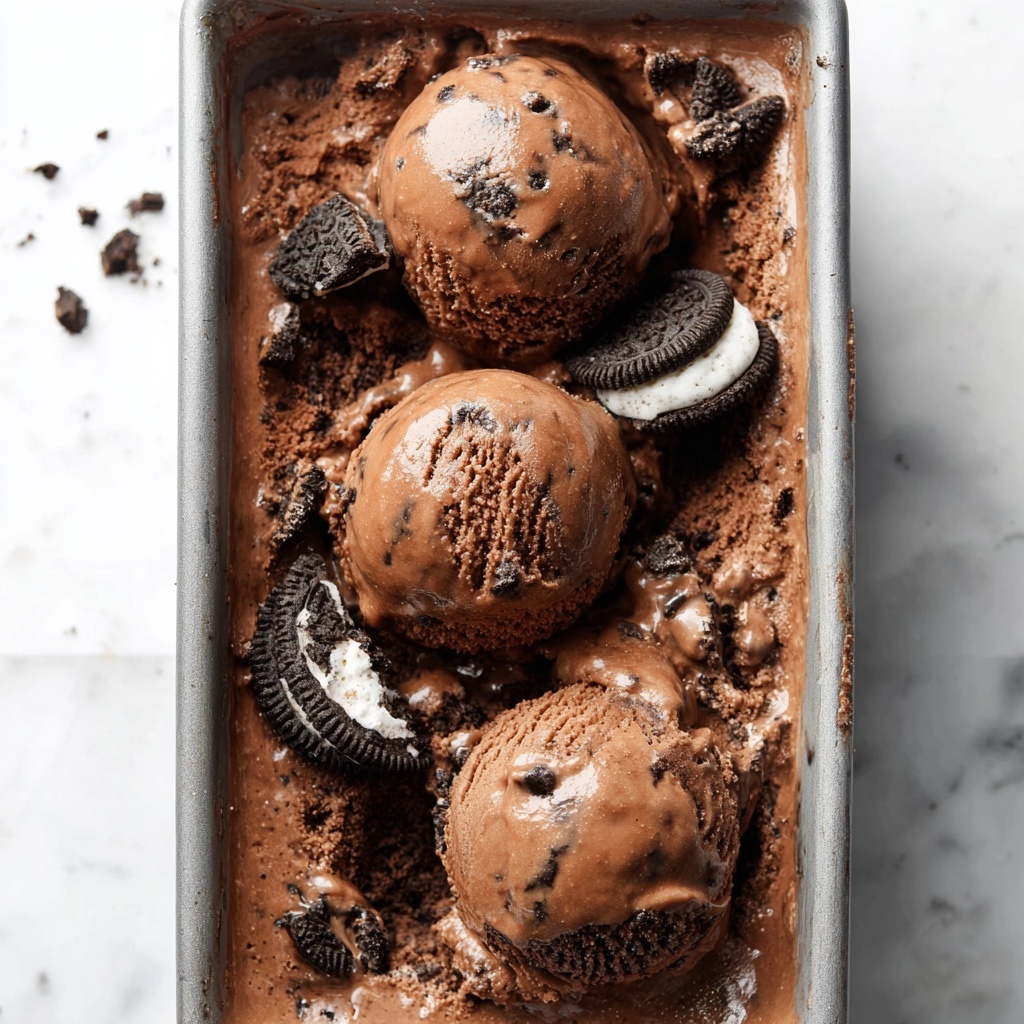
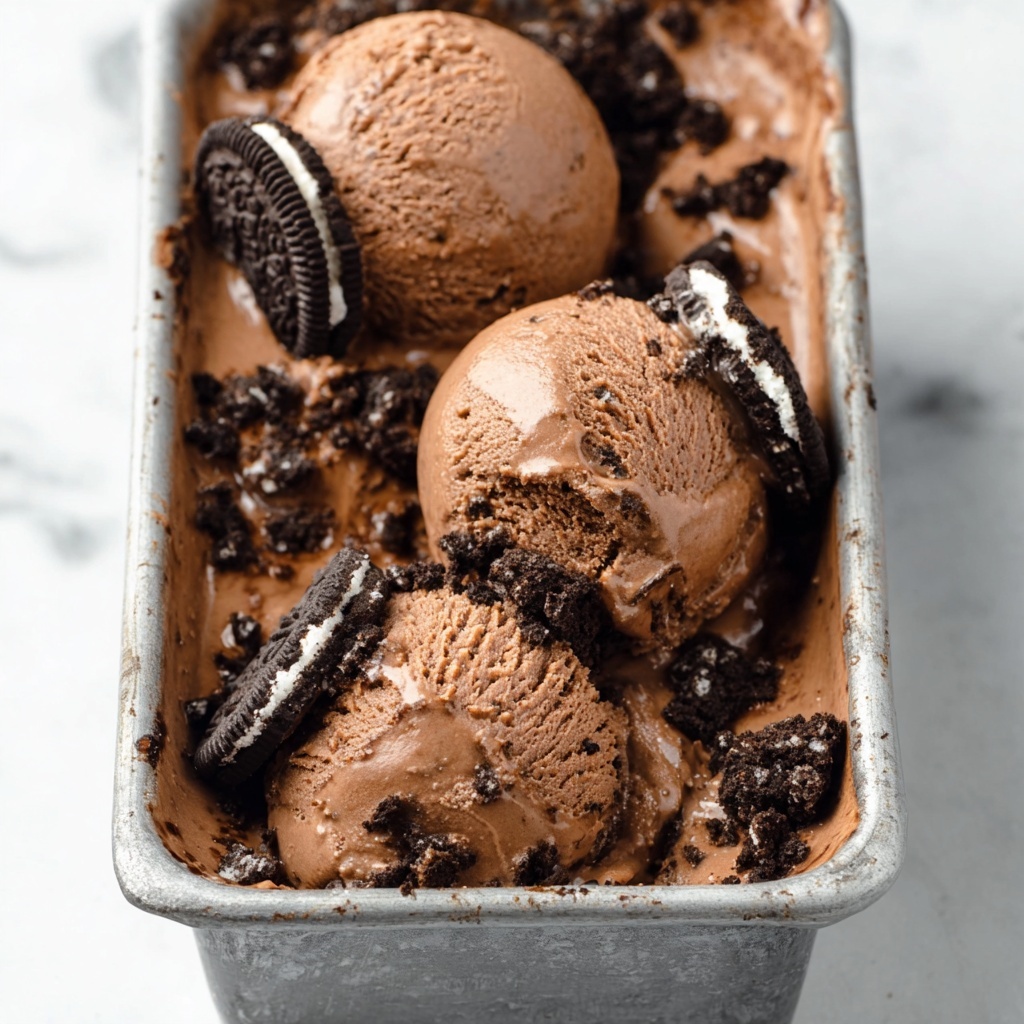
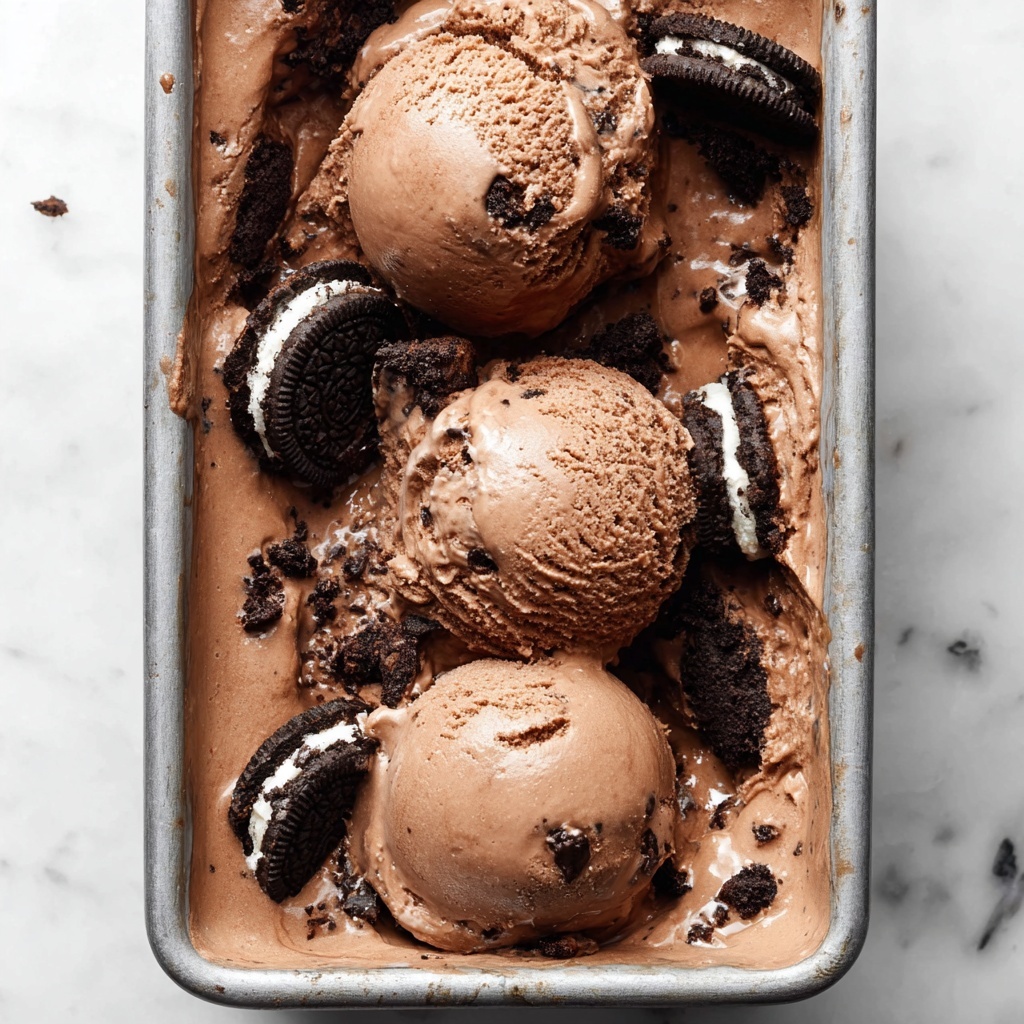
- Vegan Oreos or cookies: Optional, but they add delightful texture and a fun twist to the final ice cream.
How to Make Vegan Chocolate Ice Cream (No Coconut & Nut-Free) Recipe
Step 1: Make Sweetened Condensed Soy Milk
This step is the heart of our ice cream’s luscious texture. Combine soy milk, caster sugar, and sea salt in a large saucepan. Heat gently while stirring until the sugar completely dissolves. Then bring the mixture to a gentle simmer and let it cook slowly, whisking every 15 minutes for 2 hours. Patience here pays off, as the liquid thickens and reduces into a sticky, rich condensed milk that forms the base of the ice cream.
Step 2: Combine Creamy Ingredients
Once your sweetened condensed soy milk has chilled, transfer it to a large mixing bowl. Whisk in the soy cream gradually—this ensures a perfect, smooth incorporation that enhances the silkiness. Add oat milk and vanilla extract next, whisking thoroughly so the flavors meld nicely and the mixture stays velvety.
Step 3: Mix in the Chocolate
Time to bring the deep chocolate flavor alive. Add Dutch-processed cocoa powder in small increments, whisking consistently after each addition. This step prevents lumps and lets the cocoa fully blend into your creamy base, resulting in that classic, rich taste you expect from a decadent chocolate ice cream.
Step 4: Churn and Add Cookies
Pour the smooth mixture into your ice cream machine and churn according to the manufacturer’s instructions—approximately 40 minutes for most machines. Near the end of churning, fold in crushed vegan Oreos or your favorite vegan cookies for a satisfying crunch and extra flavor dimension.
Step 5: Freeze Until Firm
Transfer the churned ice cream into a loaf pan lined with parchment paper. Cover it to avoid freezer burn and let it set for at least 2 hours in the freezer. For the best scoopable texture, allow it to sit out for 5 to 10 minutes before serving.
How to Serve Vegan Chocolate Ice Cream (No Coconut & Nut-Free) Recipe
Garnishes
When serving, a sprinkle of cacao nibs, a drizzle of vegan chocolate sauce, or even fresh berries can elevate the presentation and add complementary flavors and textures that make each bite exciting and fresh.
Side Dishes
This vegan chocolate ice cream pairs wonderfully with warm desserts like vegan brownies, spiced fruit crisps, or even simple slices of banana bread. The contrast between warm and cold adds another layer of delight to every spoonful.
Creative Ways to Present
For a fun twist, serve the ice cream sandwiched between two vegan chocolate chip cookies or layer it with crumbled cookies and berries in parfait glasses. These playful presentations make it perfect for gatherings or treats that impress both kids and adults.
Make Ahead and Storage
Storing Leftovers
Store any leftover ice cream in an airtight container in the freezer. To maintain the best flavor and texture, try to consume it within one week, as vegan ice cream bases can sometimes become icy if stored too long.
Freezing
This ice cream freezes beautifully thanks to the soy cream base. Keep it covered tightly and freeze on a flat surface to maintain shape. Avoid frequent temperature changes to preserve creaminess.
Reheating
No reheating needed here! Instead, simply remove the ice cream from the freezer 5 to 10 minutes before serving to let it soften just enough to scoop easily without melting completely.
FAQs
Can I substitute soy milk with other plant milks?
Absolutely! While soy milk and soy cream give the best creamy texture, you can experiment with oat or rice milk and plant-based creams. Just keep in mind that texture and flavor may vary slightly.
Are there alternatives to Dutch-processed cocoa powder?
You can use natural cocoa powder, but the ice cream may taste slightly more acidic and less smooth. Dutch-processed cocoa provides the mellow, rich chocolate flavor that complements this recipe perfectly.
Can I make this ice cream without an ice cream machine?
Yes! You can freeze the mixture in a container and stir vigorously every 30 minutes for a few hours to break up ice crystals. It won’t be quite as smooth, but still delicious.
How long does the condensed soy milk keep if made ahead?
Keep it refrigerated in an airtight container for up to 3 days. Make sure to cool it completely before storing.
Is this recipe suitable for kids?
Definitely! It’s a wholesome treat free from nuts and coconut, with natural ingredients and just the right sweetness that kids adore.
Final Thoughts
This Vegan Chocolate Ice Cream (No Coconut & Nut-Free) Recipe is proof that dietary restrictions don’t mean sacrificing flavor or indulgence. It’s creamy, chocolatey, and brimming with character—a recipe I’m sure you’ll return to time and time again. So grab your ingredients, have fun making it, and most importantly, enjoy every decadent bite with your loved ones!
Print
Vegan Chocolate Ice Cream (No Coconut & Nut-Free) Recipe
- Prep Time: 15 minutes
- Cook Time: 2 hours 15 minutes
- Total Time: 4 hours 30 minutes
- Yield: 8 servings
- Category: Dessert
- Method: Stovetop
- Cuisine: Vegan
- Diet: Vegan
Description
This Vegan Chocolate Ice Cream recipe is a creamy, rich treat that excludes coconut and nuts, making it allergy-friendly and perfect for those avoiding these ingredients. Made with soy milk, soy cream, and oat milk, it’s a decadent vegan dessert with the added texture of crushed vegan cookies. The ice cream base is enriched with Dutch processed cocoa powder and slowly simmered sweetened condensed soy milk for depth of flavor and a smooth, luscious texture.
Ingredients
Sweetened Condensed Soy Milk
- 4.25 cups unsweetened soy milk
- 1 cup caster sugar (superfine sugar or cane sugar)
- ¼ teaspoon sea salt
Ice Cream Base
- 14.1 oz soy cream
- ⅓ cup oat milk (or other plant-based milk of choice)
- 1 teaspoon vanilla extract
- 6 tablespoons Dutch processed cocoa powder
Add-ins
- 8–10 vegan Oreos (or other vegan cookies of choice)
Instructions
- Make Sweetened Condensed Soy Milk: In a large saucepan, combine the soy milk, caster sugar, and sea salt. Heat over medium heat, stirring to dissolve the sugar. Once dissolved, increase heat until the mixture simmers, then reduce to medium to maintain a gentle simmer. Stir frequently to prevent boiling over.
- Simmer to Thicken: Simmer the mixture for about 2 hours, whisking every 15 minutes. This thickens the mixture, concentrating the flavors and creating a condensed milk consistency. In the last 15 minutes, watch closely as the mixture becomes sticky and thick, resembling regular condensed milk.
- Check Consistency and Reduce if Needed: Pour the mixture into a heat-proof bowl or jug to measure — aim for about 350g. If the volume is higher, return to heat for another 10-15 minutes, stirring to reduce and thicken further.
- Prepare Ice Cream Mixture: Once cooled, transfer the condensed soy milk to a large bowl. Gradually whisk in the soy cream until fully incorporated and smooth.
- Add Flavors: Stir in the oat milk and vanilla extract, whisking to combine evenly. Add the Dutch processed cocoa powder in one tablespoon increments, whisking thoroughly after each addition to achieve a uniform chocolate mixture.
- Churn the Ice Cream: Pour the prepared mixture into your ice cream machine and churn according to the manufacturer’s instructions, typically around 40 minutes, until the ice cream reaches a soft-serve texture.
- Mix in Cookie Pieces: Transfer the churned ice cream into a large bowl and gently fold in the crushed vegan Oreos, distributing them evenly throughout the ice cream.
- Freeze to Set: Line a loaf pan with parchment paper and spread the ice cream mixture inside. Cover and freeze for a minimum of 2 hours to firm up.
- Serve: Remove the ice cream from the freezer 5-10 minutes before serving to soften slightly for easier scooping and optimal texture.
Notes
- Use vegan cookies such as Oreos to keep the ice cream dairy-free and nut-free.
- Keep a close eye on the soy milk mixture during simmering to prevent boiling over and scorching.
- If you prefer a richer or lighter ice cream, experiment with different plant-based milk alternatives in the oat milk measurement.
- This recipe requires an ice cream maker; no-churn variations will adjust texture and technique.


