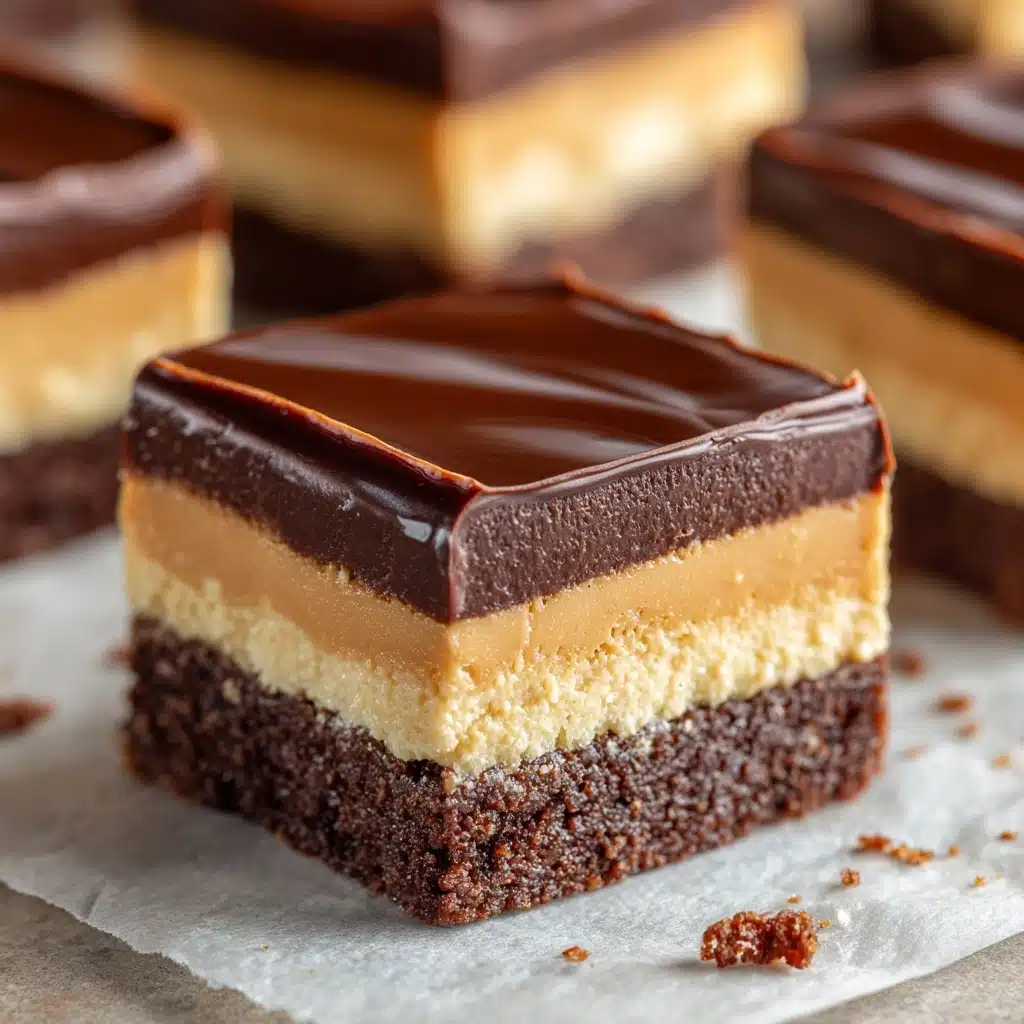
Buckeye Brownies are the ultimate dessert bar that combines rich, fudgy chocolate brownies, a thick creamy peanut butter layer, and a shiny chocolate topping, all stacked together in glorious harmony. Imagine sinking your teeth into a bar that’s part brownie, part giant peanut butter cup, with each layer perfectly complementing the next. Whether you’re baking for a family celebration, a potluck, or simply treating yourself at home, these Buckeye Brownies will steal the show and delight everyone lucky enough to snag one!
Ingredients You’ll Need
Ingredients You’ll Need
These Buckeye Brownies come together with just a handful of pantry-friendly ingredients, but each is crucial for nailing that signature texture and flavor. Don’t skip or swap lightly—every component plays an important role!
- Brownie mix: The foundation! Choose your favorite boxed brownie mix (18–19 oz) for a guaranteed fudgy base that saves time without sacrificing taste.
- Eggs, oil, and water: Mixed into your brownie base as directed by your mix’s instructions, these bring structure and richness.
- Creamy peanut butter: Opt for classic creamy peanut butter—the kind you’d spread on a sandwich—for the smoothest middle layer.
- Unsalted butter: Softened butter creates a luscious, easily spreadable peanut butter filling and supports a velvety texture.
- Powdered sugar: Essential for sweetness and for thickening the peanut butter layer to sliceable perfection.
- Milk: Just a splash or two helps loosen the peanut butter filling for effortless spreading.
- Semi-sweet chocolate chips: Melted for the glossy, irresistible top layer—just the right balance of sweet and rich.
- Butter (for chocolate topping): Adds silkiness and shine to the melted chocolate, making it easy to cut when chilled.
How to Make Buckeye Brownies
Step 1: Bake the Brownie Base
Start by preheating your oven to 350°F, or whatever the box mix recommends. Line your 9×13-inch pan with parchment or give it a generous spritz of nonstick spray for super-easy removal later. Mix up your brownies according to the directions on your mix box, pour into the prepared pan, and bake until set and glossy. Let the brownies cool completely so the next layers won’t melt and slide around—this is key for tidy, beautiful Buckeye Brownies!
Step 2: Whip Up the Peanut Butter Layer
While your brownies cool, grab a medium bowl and beat together the creamy peanut butter, softened unsalted butter, powdered sugar, and milk. You’re looking for a smooth, thick, spreadable filling—firm enough to hold up to slicing, but dreamy on the tongue. Pour and gently spread this peanut butter goodness over your cooled brownies in an even layer. Pop the whole pan in the fridge so it firms up while you make the final topping.
Step 3: Make the Chocolate Topping
Now for the magic finish: combine the semi-sweet chocolate chips and butter in a microwave-safe bowl. Melt them in 30-second bursts, stirring each time, until everything is silky smooth. Let it cool just a little, then pour over the peanut butter layer. Use a spatula to gently nudge the chocolate right to the edges for full coverage. Refrigerate for at least an hour until the top is set and glossy.
Step 4: Slice and Serve
Once everything is chilled and firm, it’s time for the grand reveal! Use a sharp knife run under hot water (and wiped clean between cuts) to slice your Buckeye Brownies into tidy squares. This trick gives you those beautiful, bakery-style edges that will tempt anyone who walks by!
How to Serve Buckeye Brownies
Garnishes
For a special flourish, sprinkle a few mini chocolate chips or a dusting of flaky sea salt on top of the chocolate layer before it sets. A drizzle of melted peanut butter or a few chopped roasted peanuts also adds a hint of crunch and flair—delicious and eye-catching!
Side Dishes
Buckeye Brownies are decadent on their own, but they play wonderfully with a scoop of vanilla or peanut butter ice cream on the side. A tall glass of cold milk, hot coffee, or even a rich porter beer make perfect sweet accompaniments if you’re looking for a grown-up pairing.
Creative Ways to Present
If you’re serving these at a party, try cutting the brownies into smaller bite-sized squares and nestle each one in a mini cupcake liner for easy, grab-and-go treats. For festive gatherings, layer pieces with berries or whipped cream in parfait cups, or stack them in a tower for an eye-catching dessert centerpiece that’s impossible to resist!
Make Ahead and Storage
Storing Leftovers
Store any remaining Buckeye Brownies in an airtight container in the refrigerator. They’ll stay fresh and delicious for up to 5 days—just be sure to separate layers with a bit of parchment paper so they don’t stick together.
Freezing
For longer storage, Buckeye Brownies freeze beautifully! Arrange them in a single layer (or with parchment in between layers), seal well, and freeze for up to 2 months. Thaw them in the fridge overnight for best texture before serving.
Reheating
There’s no need to reheat these brownies, but if you prefer them just a touch warm, give a square 10–15 seconds in the microwave. This softens the chocolate topping slightly without melting the layers together. Serve promptly for the best experience.
FAQs
Do I have to use boxed brownie mix?
Nope—you can absolutely use your favorite homemade brownie recipe for the base of your Buckeye Brownies. Just bake it in a 9×13-inch pan and make sure it’s fully cooled before layering.
Can I use chunky peanut butter instead of creamy?
You can, but the creamy variety really gives that classic, smooth texture and clean appearance. If you love a little crunch, sprinkle chopped peanuts over the top as a garnish instead!
Are Buckeye Brownies gluten-free?
This recipe is not gluten-free as written, but you can make it so by choosing a gluten-free brownie mix and checking that your other ingredients (especially chocolate chips and peanut butter) are certified gluten-free.
Why is it called a “Buckeye” Brownie?
The “Buckeye” name comes from the famous Ohio candy: peanut butter balls dipped in chocolate to look like buckeye nuts. This brownie version borrows the same peanut butter and chocolate combination, but transforms it into an indulgent layered treat!
How do I get clean slices?
For those perfect bakery-style edges, run your knife under hot water, wipe dry, and slice. Clean the blade and repeat between every cut. It’s a simple trick that makes your Buckeye Brownies look extra irresistible.
Final Thoughts
If you love chocolate and peanut butter, it simply doesn’t get better than Buckeye Brownies. These bars are rich, nostalgic, and guaranteed to draw a crowd. Give this recipe a try and watch your friends and family light up at the first fudgy, peanut-buttery bite—you might want to make a double batch!
Print
Buckeye Brownies Recipe
- Total Time: 1 hour 45 minutes (including chilling)
- Yield: 24 brownies 1x
- Diet: Vegetarian
Description
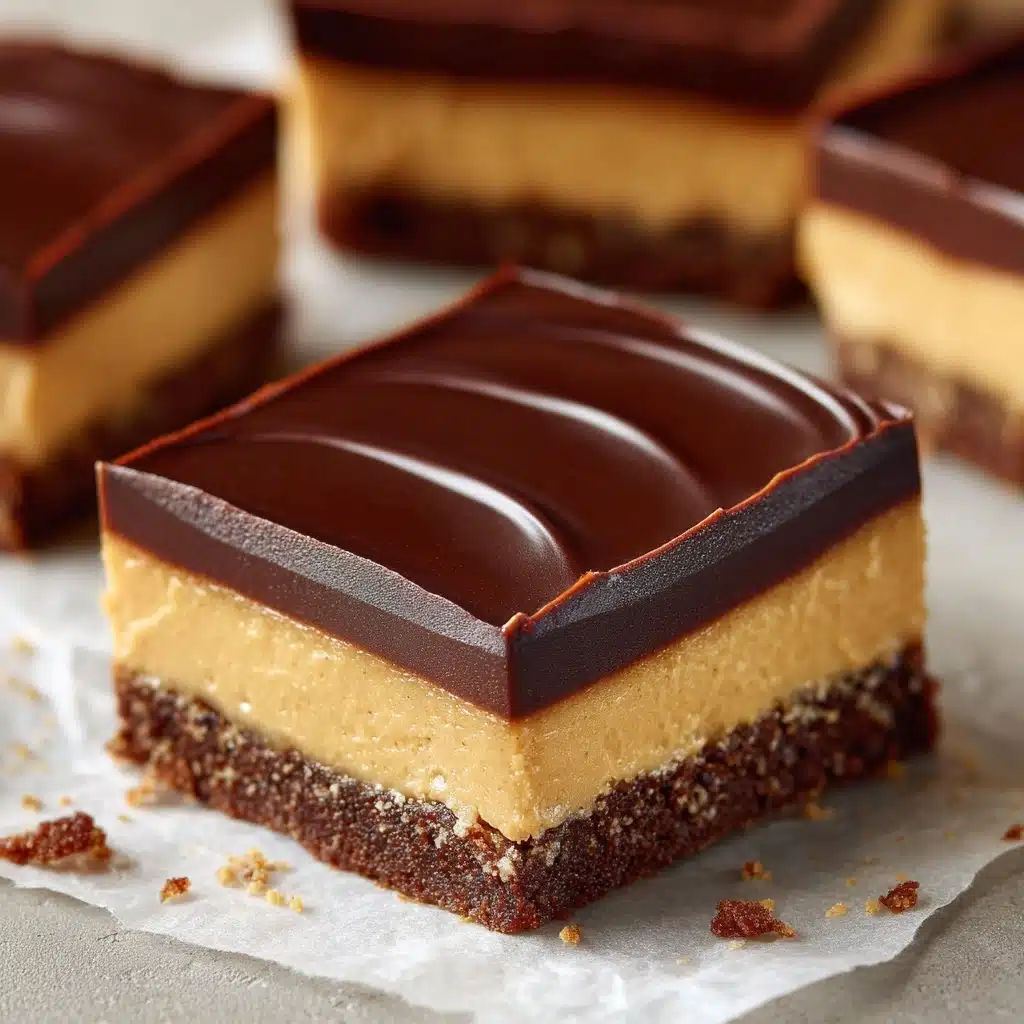
Indulge in the irresistible combination of rich chocolate brownies topped with a creamy layer of peanut butter and a decadent chocolate glaze in these Buckeye Brownies. Perfect for any occasion, these delicious treats are sure to satisfy any sweet tooth!
Ingredients
For the Brownie Base:
- 1 box brownie mix (18–19 oz), plus ingredients listed on the box (usually eggs, oil, and water)
For the Peanut Butter Layer:
- 1 cup creamy peanut butter
- ½ cup unsalted butter, softened
- 2 cups powdered sugar
- 2–3 tablespoons milk
For the Chocolate Topping:
- 1½ cups semi-sweet chocolate chips
- 2 tablespoons butter
Instructions
- Preheat oven to 350°F (or as directed on brownie mix box) and prepare a 9×13-inch baking pan with parchment paper or nonstick spray. Mix and bake the brownies according to package instructions. Let cool completely.
- In a medium bowl, beat together the peanut butter, softened butter, powdered sugar, and milk until smooth and creamy. Spread evenly over the cooled brownies. Place in the fridge to chill while making the chocolate topping.
- In a microwave-safe bowl, melt the chocolate chips and butter in 30-second intervals, stirring between each, until smooth. Let cool for 1–2 minutes, then pour over the peanut butter layer and spread evenly.
- Refrigerate for at least 1 hour or until set. Slice into squares and serve.
Notes
- For easier slicing, run a sharp knife under hot water and wipe clean between cuts.
- Store in the fridge for up to 5 days or freeze for longer storage.
- Prep Time: 20 minutes
- Cook Time: 25 minutes
- Category: Dessert
- Method: Baking
- Cuisine: American
Nutrition
- Serving Size: 1 brownie
- Calories: 280
- Sugar: 26g
- Sodium: 140mg
- Fat: 15g
- Saturated Fat: 7g
- Unsaturated Fat: 6g
- Trans Fat: 0g
- Carbohydrates: 32g
- Fiber: 2g
- Protein: 4g
- Cholesterol: 20mg


