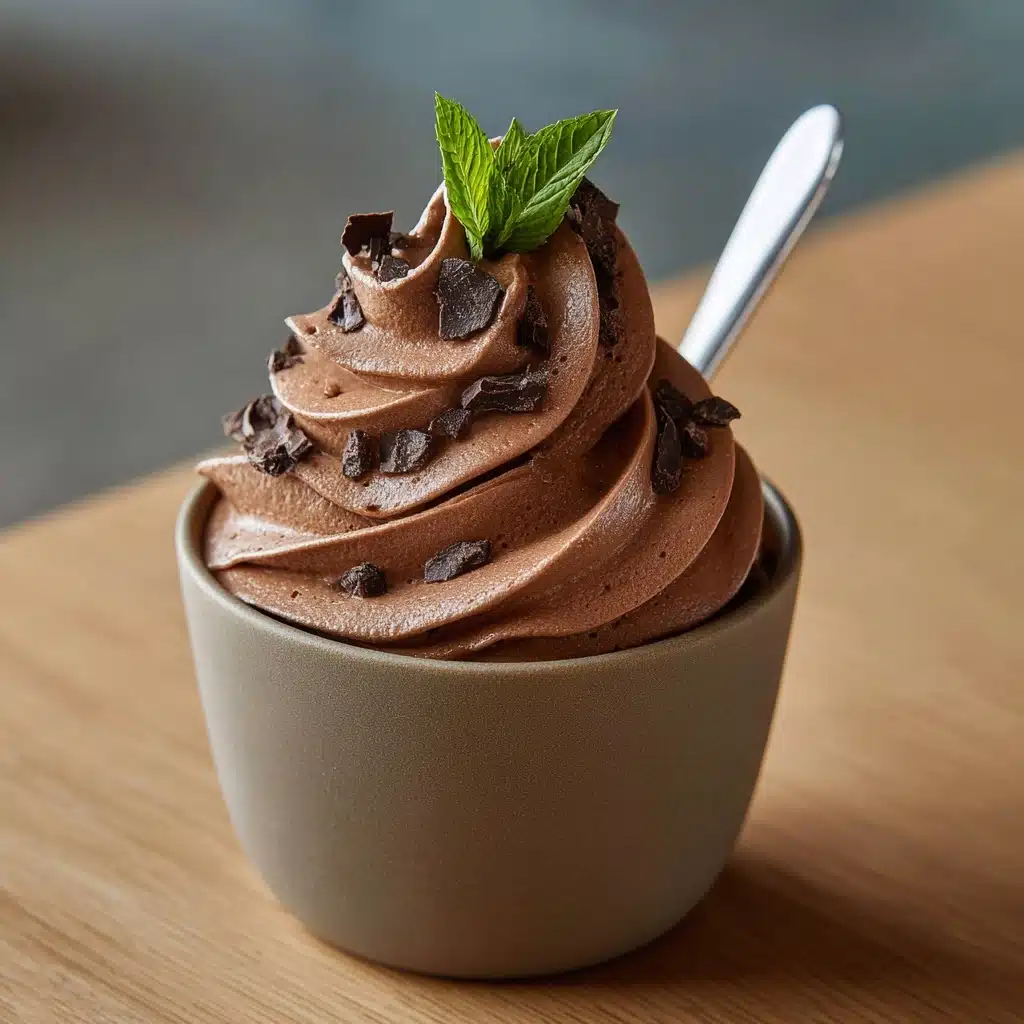
Meet your new go-to treat: Whipped Chocolate Peanut Butter Dessert! This luscious no-bake pie brings together creamy peanut butter, fluffy whipped cream, swirls of rich chocolate, and a buttery cookie crust in one dream of a dessert. Perfect for sharing with friends or treating yourself after a long day, every bite melts in your mouth and balances decadent chocolate with nutty sweetness. You only need a handful of everyday ingredients and a bit of chilling time—trust me, this is the kind of dessert you’ll crave again and again.
Ingredients You’ll Need
One of the best things about the Whipped Chocolate Peanut Butter Dessert is its simplicity—each ingredient plays a starring role in creating the perfect texture and flavor! From the tangy cream cheese to the rich chocolate syrup, every element shines, and together they transform into an irresistible creamy pie.
- Cream Cheese (8 oz block, softened): This gives the filling its rich, luscious body and just the right amount of tang.
- Creamy Peanut Butter (½ cup): For that signature nutty flavor and silky-smooth texture; go with your favorite brand.
- Powdered Sugar (½ cup): Sweetens the filling without any graininess—powdered sugar melts right in!
- Vanilla Extract (1 teaspoon): Brings a lovely background warmth that makes all the flavors pop.
- Heavy Whipping Cream (1 cup, cold): Whipped into clouds and folded in for a feather-light, mousse-like texture.
- Chocolate Syrup or Hot Fudge (½ cup plus extra for drizzling): Adds decadent swirls of chocolate throughout and a pretty finish on top.
- Pre-made Chocolate Cookie Crust or Graham Cracker Crust (1): The crunchy, buttery base that holds it all together—grab one to save time, or use homemade.
- Chopped Peanuts or Mini Chocolate Chips (optional, for topping): For a bit of crunch and fun, sprinkle these over the finished pie.
How to Make Whipped Chocolate Peanut Butter Dessert
Step 1: Mix the Creamy Base
Start by grabbing a large mixing bowl and beating together the softened cream cheese, peanut butter, powdered sugar, and vanilla extract. You want this mixture super smooth, with no lumps—an electric mixer works best, but good old-fashioned elbow grease does the trick, too! If you’re tempted to sneak a spoonful at this stage… I’m right there with you, it’s already delicious.
Step 2: Whip the Cream
In a separate, clean bowl, whip your cold heavy cream until stiff peaks form. Cold cream whips up fluffy and stable, so don’t rush this part! The magic here is all in the volume—the whipped cream gives your Whipped Chocolate Peanut Butter Dessert that light, cloud-like bite everyone loves.
Step 3: Fold Together
Now gently fold the whipped cream into your peanut butter mixture. Work slowly and use a spatula to preserve all that wonderful airiness. It should come together into one dreamy, billowy filling—don’t overmix! The goal is a beautifully blended, pillowy mixture that will set up perfectly in the fridge.
Step 4: Swirl in Chocolate
Drizzle your chocolate syrup or thick, slightly warmed hot fudge over the top of the filling, then use a spoon or butter knife to gently swirl it throughout. Don’t stir too much—you want lovely ribbons and pockets of chocolate rather than fully mixing it in. This gives your Whipped Chocolate Peanut Butter Dessert that stunning marbled look!
Step 5: Assemble and Chill
Spoon the filling into your pre-made cookie or graham cracker crust and spread it out evenly. Drizzle a little more chocolate syrup on top, and finish with a sprinkle of chopped peanuts or mini chocolate chips for color and crunch. Pop the whole thing in the fridge for at least three hours (overnight is even better) until it’s set and sliceable.
How to Serve Whipped Chocolate Peanut Butter Dessert

Garnishes
The finishing touches take this dessert from simple to sensational. After slicing, drizzle each piece with extra chocolate syrup or hot fudge and a handful of peanuts or mini chips for a delightful contrast of flavor and texture. You can even add a dollop of whipped cream or a dusting of cocoa powder if you’re feeling fancy.
Side Dishes
Because the Whipped Chocolate Peanut Butter Dessert is so rich and satisfying, it pairs beautifully with lighter sides. Think fresh strawberries, sliced bananas, or a crisp fruit salad to cut through the sweetness. For a cozier feel, a cup of dark roast coffee or a glass of cold milk complements every dreamy bite.
Creative Ways to Present
Don’t be afraid to get playful! Try making individual mini pies using muffin tins and cookie crusts for easy grab-and-go treats, or layer slices into parfait glasses with crushed cookies and extra chocolate syrup for a fun twist. Serve with tiny spoons for dainty dessert platters at parties—this pie loves to dress up!
Make Ahead and Storage
Storing Leftovers
Cover any remaining pie tightly with plastic wrap or transfer slices to an airtight container. The Whipped Chocolate Peanut Butter Dessert keeps beautifully in the refrigerator for up to four days. The flavors actually deepen a little overnight—if you can wait, that is!
Freezing
Want to turn this into a frozen treat? Pop the whole pie or individual slices in the freezer for a couple of hours until solid. Let it soften at room temperature for about 10–15 minutes before serving for an ice-cold, indulgent delight—especially perfect for hot summer days.
Reheating
No reheating required here! This is a chill-and-serve dessert. If you’ve frozen the pie, simply allow it to thaw slightly in the fridge or at room temperature until it’s creamy and easy to slice. Enjoy straight from the fridge for that signature cool, whipped texture.
FAQs
Can I use crunchy peanut butter instead of creamy?
Absolutely! Crunchy peanut butter adds extra texture and a little surprise with every bite. Your filling may be slightly less smooth, but if you love nutty crunch, it’s a great swap.
What’s the best way to get neat chocolate swirls?
Drizzle the syrup in thin lines over the filling and gently draw a butter knife through the mixture in a zig-zag or spiral pattern. Go slowly and stop as soon as you see swirls—it’s all about a marbled look, not mixing it in completely.
Can I make Whipped Chocolate Peanut Butter Dessert ahead of time?
Definitely! This dessert is even better when made the day before serving. Chilling overnight allows it to firm up and makes slicing easier, so it’s perfect for parties and gatherings.
What can I use if I don’t have a pre-made crust?
You can quickly make your own by combining crushed chocolate cookies or graham crackers with melted butter, then pressing it into a pie plate and chilling it before filling. The flavor options are endless!
Is there a lighter version of this recipe?
For a lighter spin, try swapping regular cream cheese for reduced-fat, or using light whipped topping instead of heavy cream. Just note that the texture may be a bit softer, but still delicious!
Final Thoughts
If you’re in the mood for something easy, impressive, and utterly satisfying, treat yourself and your loved ones to this Whipped Chocolate Peanut Butter Dessert. It’s a breeze to make but always delivers that wow factor—it’s sure to become your go-to sweet fix. Give it a try, and get ready for “Can I have the recipe?” at every gathering!
Print
Whipped Chocolate Peanut Butter Dessert Recipe
- Total Time: 3 hours 15 minutes (including chilling)
- Yield: 8 servings 1x
- Diet: Non-Vegetarian
Description
Indulge in the creamy decadence of this no-bake Whipped Chocolate Peanut Butter Dessert. A luscious blend of cream cheese, peanut butter, and chocolate swirled together in a chocolate cookie crust, topped with a sprinkle of nuts or chocolate chips.
Ingredients
Cream Cheese Mixture:
- 1 (8 oz) block cream cheese, softened
- 1/2 cup creamy peanut butter
- 1/2 cup powdered sugar
- 1 teaspoon vanilla extract
Whipped Cream:
- 1 cup heavy whipping cream, cold
- 1/2 cup chocolate syrup or hot fudge, plus extra for drizzling
- 1 pre-made chocolate cookie crust or graham cracker crust
- Chopped peanuts or mini chocolate chips, optional, for topping
Instructions
- Cream Cheese Mixture: In a large mixing bowl, beat the softened cream cheese, peanut butter, powdered sugar, and vanilla extract until smooth and creamy.
- Whipped Cream: In a separate bowl, whip the cold heavy cream until stiff peaks form. Gently fold the whipped cream into the peanut butter mixture until fully combined and light in texture.
- Chocolate Swirl: Drizzle in the chocolate syrup or hot fudge and gently swirl it through the mixture—do not overmix to keep the swirl effect.
- Assembly: Spoon the filling into the prepared crust and smooth the top. Drizzle additional chocolate syrup on top and sprinkle with chopped peanuts or mini chocolate chips if desired.
- Chill: Chill in the refrigerator for at least 3 hours, or until set.
Notes
- This no-bake dessert can be made a day ahead and stored in the fridge.
- For a frozen version, place in the freezer for 2–3 hours and let soften slightly before serving.
- Prep Time: 15 minutes
- Cook Time: 0 minutes
- Category: Dessert
- Method: No-Bake
- Cuisine: American
Nutrition
- Serving Size: 1 slice
- Calories: 410
- Sugar: 22g
- Sodium: 210mg
- Fat: 30g
- Saturated Fat: 15g
- Unsaturated Fat: 13g
- Trans Fat: 0g
- Carbohydrates: 30g
- Fiber: 2g
- Protein: 7g
- Cholesterol: 65mg


