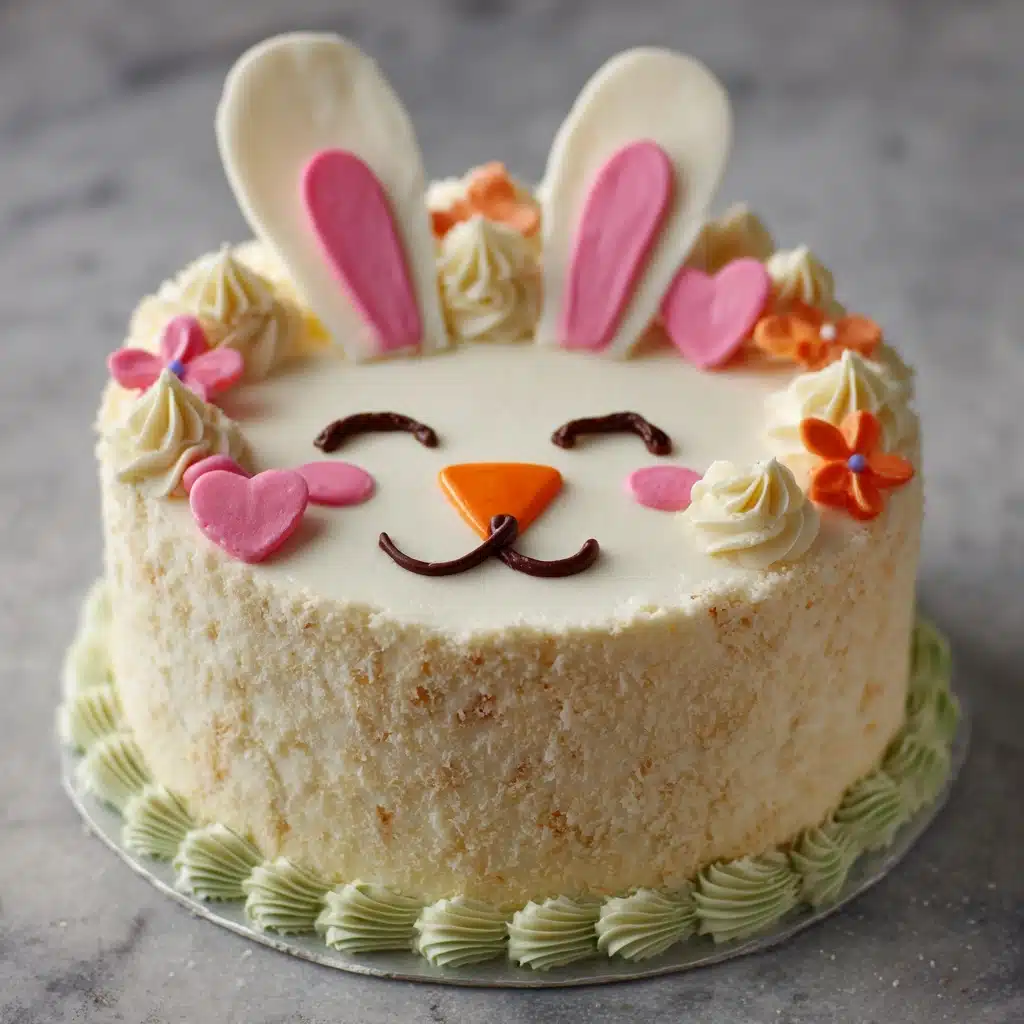
If ever there were a showstopping dessert that perfectly captures the joy and charm of spring, it’s the Easter Bunny Cake. This whimsical treat instantly lights up any table with its adorable bunny face, coconut “fur,” and irresistible candy decorations. Whether you’re baking with kids or delighting family and friends, making this cake brings people together in the sweetest way possible. Get ready for giggles, creative decorating, and big smiles—the Easter Bunny Cake has a magical way of making Easter extra-special!
Ingredients You’ll Need
With just a handful of pantry staples and a dash of creativity, you’ll have everything you need for a fun and delicious Easter Bunny Cake. Each ingredient plays a special part—think fluffy cake layers, sweet coconut for fur, and playful decorations that bring the bunny to life!
- 1 box white or yellow cake mix: The perfect base for a tender cake that’s easy to shape and decorate.
- Ingredients for cake mix: Typically eggs, oil, and water—check your box for exact amounts to get the best results.
- 1 1/2 cups sweetened shredded coconut: Essential for that fluffy, adorable “fur” covering every inch of the bunny.
- 1 container (16 oz) vanilla or cream cheese frosting: Smooth, sweet, and ideal for both sticking everything together and making decorating a breeze.
- Pink food coloring: A few drops add just the right pop of color for those cute bunny ears.
- 2 black jelly beans: These become the sparkling eyes that give your bunny life and personality.
- 1 pink jelly bean: Instantly creates the perfect little bunny nose right in the center of the face.
- 1 large marshmallow (cut in half): Forms the bunny’s puffy cheeks for extra cuteness.
- 2 mini marshmallows: Turn these into tiny bunny teeth, a detail that always delights.
- 2 graham crackers or paper cutouts: Use these to craft the tall, floppy bunny ears (so easy to customize!).
- Colored sprinkles or candy (optional): For extra decoration—think of these as an invitation to get creative!
How to Make Easter Bunny Cake
Step 1: Bake the Cakes
Start by preparing your cake mix according to the box instructions, dividing the batter evenly between two 8-inch round cake pans. Bake until a toothpick comes out clean and the tops are lightly golden. Allow the cakes to cool completely before assembling; this keeps the frosting from melting and makes decorating easier for everyone.
Step 2: Shape the Bunny
Once cooled, place one round cake on your serving platter—this will be the bunny’s head. Slice the second cake in half to make the ears. Arrange each half on either side of the head, cut side down, and secure them with a little frosting. Already, your Easter Bunny Cake is starting to take shape!
Step 3: Frost—for a Smooth Start
Spread a thin “crumb coat” layer of frosting over the whole bunny, covering both the head and ears. This locks in any crumbs and gives you a smooth base for decorating. Chill the cake for 15 to 20 minutes, letting the frosting set just enough.
Step 4: Frost Again and Add Coconut Fur
Apply a second, more generous coat of frosting, making sure you cover all the nooks and crannies. Then, using clean hands, gently press shredded coconut over the entire cake. This part is super fun for kids—and turns your creation into the fluffiest Easter Bunny Cake!
Step 5: Decorate Your Bunny Face
Tint a small amount of frosting with pink food coloring and fill in the insides of the bunny’s ears for an extra burst of color. Create the face: two black jelly beans become the eyes, a pink jelly bean sits at the center for the nose, the halved large marshmallow makes adorable chubby cheeks, and two mini marshmallows are the perfect bunny teeth. Add sprinkles or candy if you’re feeling festive—the possibilities are endless!
How to Serve Easter Bunny Cake
Garnishes
When it’s time to serve, consider sprinkling extra coconut or colorful sprinkles around the base of your Easter Bunny Cake for a playful touch. A scattering of mini chocolate eggs or jelly beans adds a layer of fun and makes every slice feel like a little holiday surprise!
Side Dishes
This cake is a true centerpiece, but light and refreshing sides make a lovely contrast. Fresh berries, fruit salad, or even a platter of pastel-colored macarons are perfect pairings. For something nostalgic, you could serve with classic deviled eggs or a fruit punch that keeps things festive.
Creative Ways to Present
The presentation is half the fun! Try placing your Easter Bunny Cake on a bed of edible green “grass” (shredded coconut colored with green food gel). Or, set it atop a cake stand dotted with candied flowers or bunny-shaped cookies. For themed gatherings, surround your cake with decorated cupcakes featuring mini bunny faces for a memorable dessert display.
Make Ahead and Storage
Storing Leftovers
Wrap any leftover Easter Bunny Cake tightly with plastic wrap or store it in an airtight container. It will keep well at room temperature for up to two days, or in the refrigerator for three to four days, maintaining its flavor and moisture while that coconut “fur” stays fluffy.
Freezing
You can freeze Easter Bunny Cake! Place individual slices or larger pieces in airtight freezer bags or containers. For best results, freeze undecorated cake layers separately if you’re planning ahead, then assemble and decorate after thawing to keep everything fresh and beautiful.
Reheating
This cake is best served at room temperature, so if your Easter Bunny Cake has been chilled or frozen, let it thaw on the counter for about an hour. There’s no need to reheat—just slice and enjoy!
FAQs
Can I make this Easter Bunny Cake ahead of time?
Absolutely! You can bake the cake layers a day ahead and even store them (well-wrapped) in the fridge until you’re ready to assemble and decorate. Assembling shortly before serving ensures the freshest look and taste, but the finished cake also holds up beautifully in the fridge overnight.
How do I color shredded coconut for extra flair?
Place the coconut in a zip-top bag, add a few drops of food coloring, and shake until you get your desired pastel shade. Spread the coconut on a tray to dry for a few minutes before using it on your cake.
What if I don’t have graham crackers for the ears?
No worries! You can use sturdy paper cutouts, wafer cookies, or even shape the ears from fondant or extra cake. Just make sure anything non-edible is removed before serving.
Can I use a homemade cake recipe instead of cake mix?
Definitely! If you have a favorite scratch recipe for white or yellow cake, go for it—the Easter Bunny Cake is all about creativity and making it your own. Just use two 8-inch rounds as your base.
How can I involve kids in the decorating?
This recipe is perfect for little hands! Let kids help press the coconut onto the frosting, apply the jelly bean eyes and nose, or get creative with the candy decorations. Making the Easter Bunny Cake is a joy-filled activity for chefs of all ages.
Final Thoughts
There’s something truly joyful about bringing an Easter Bunny Cake to the table, and it’s even more special when you’ve made it yourself. Whether you follow these steps exactly or add your own creative spin, every bunny cake is as unique as its baker. Gather your loved ones, share a few laughs while decorating, and let the cake be the star of your Easter celebration!
Print
Easter Bunny Cake Recipe
- Total Time: 1 hour (plus cooling)
- Yield: 10–12 servings 1x
- Diet: Non-Vegetarian
Description
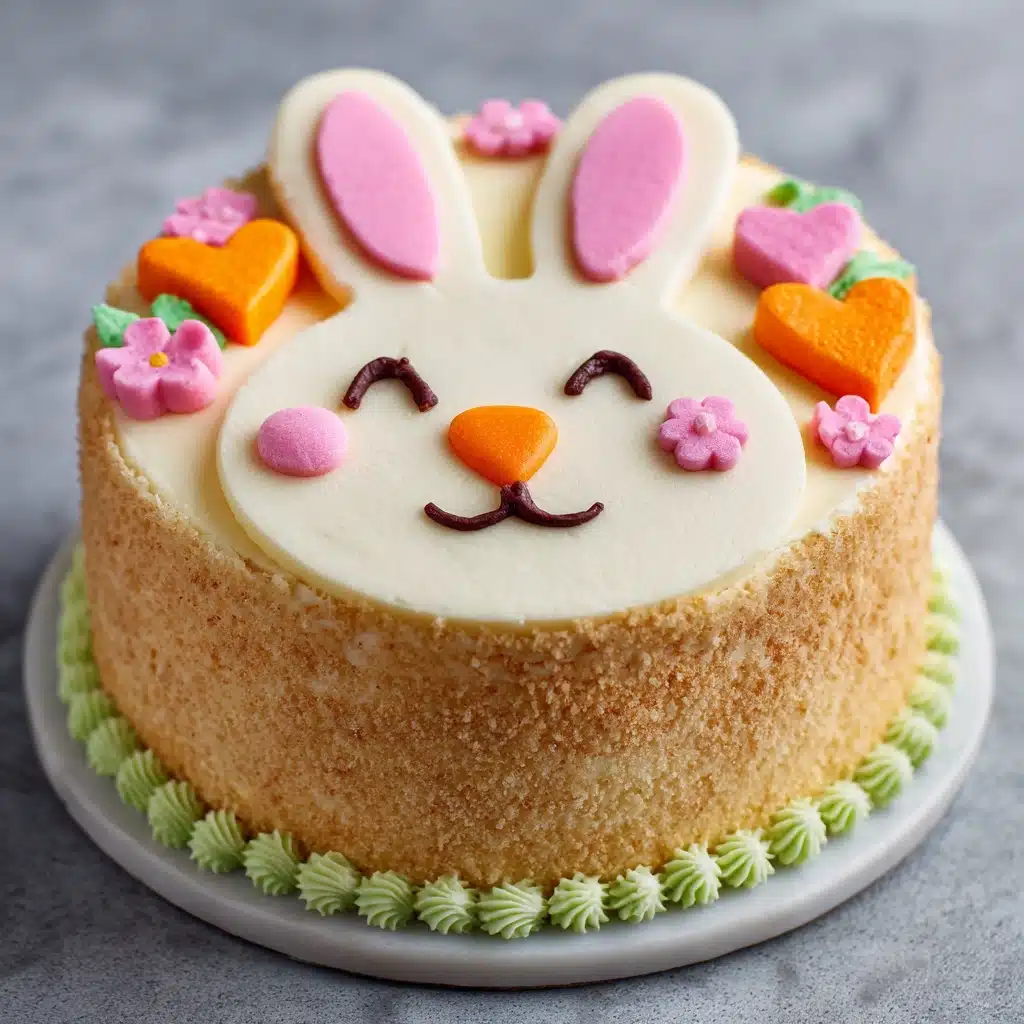
This Easter Bunny Cake is a delightful and whimsical dessert that is perfect for Easter celebrations. Made with a box cake mix, coconut, frosting, and various candies, this cake is as fun to make as it is to eat.
Ingredients
Cake:
- 1 box white or yellow cake mix (plus ingredients listed on box)
Decoration:
- 1 1/2 cups sweetened shredded coconut
- 1 container (16 oz) vanilla or cream cheese frosting
- pink food coloring
- 2 black jelly beans (for eyes)
- 1 pink jelly bean (for nose)
- 1 large marshmallow (cut in half for cheeks)
- 2 mini marshmallows (for teeth)
- 2 graham crackers or paper cutouts (for ears)
- colored sprinkles or candy (optional, for decoration)
Instructions
- Prepare the Cake: Prepare and bake the cake mix in two 8-inch round cake pans according to package instructions. Allow cakes to cool completely.
- Assemble the Bunny: Place one round cake on a serving tray to be the bunny’s head. Cut the second cake in half to form the ears. Secure with frosting.
- Decorate: Frost the entire cake with a thin layer of frosting, chill, then apply a second layer of frosting. Press shredded coconut over the cake for fur. Use frosting to decorate the ears, then add jelly beans for eyes and nose, marshmallows for cheeks, and teeth.
- Final Touches: Decorate with candy or sprinkles as desired.
Notes
- You can color the shredded coconut with pastel food coloring for a fun twist.
- This cake is perfect for kids to help decorate.
- Use chocolate cake mix for a richer flavor.
- Prep Time: 30 minutes
- Cook Time: 25 minutes
- Category: Dessert
- Method: Baking
- Cuisine: American
Nutrition
- Serving Size: 1 slice
- Calories: 350
- Sugar: 30g
- Sodium: 280mg
- Fat: 17g
- Saturated Fat: 9g
- Unsaturated Fat: 6g
- Trans Fat: 0g
- Carbohydrates: 45g
- Fiber: 1g
- Protein: 3g
- Cholesterol: 40mg


