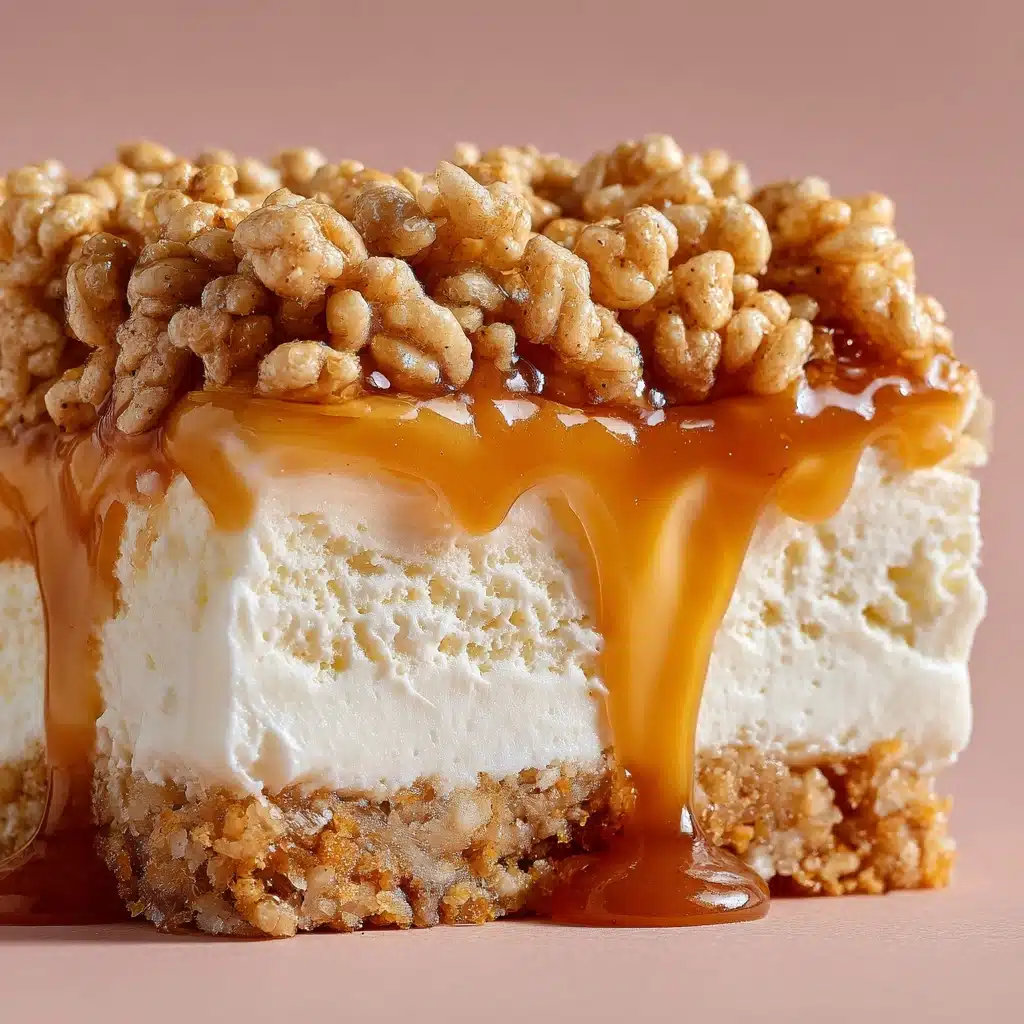
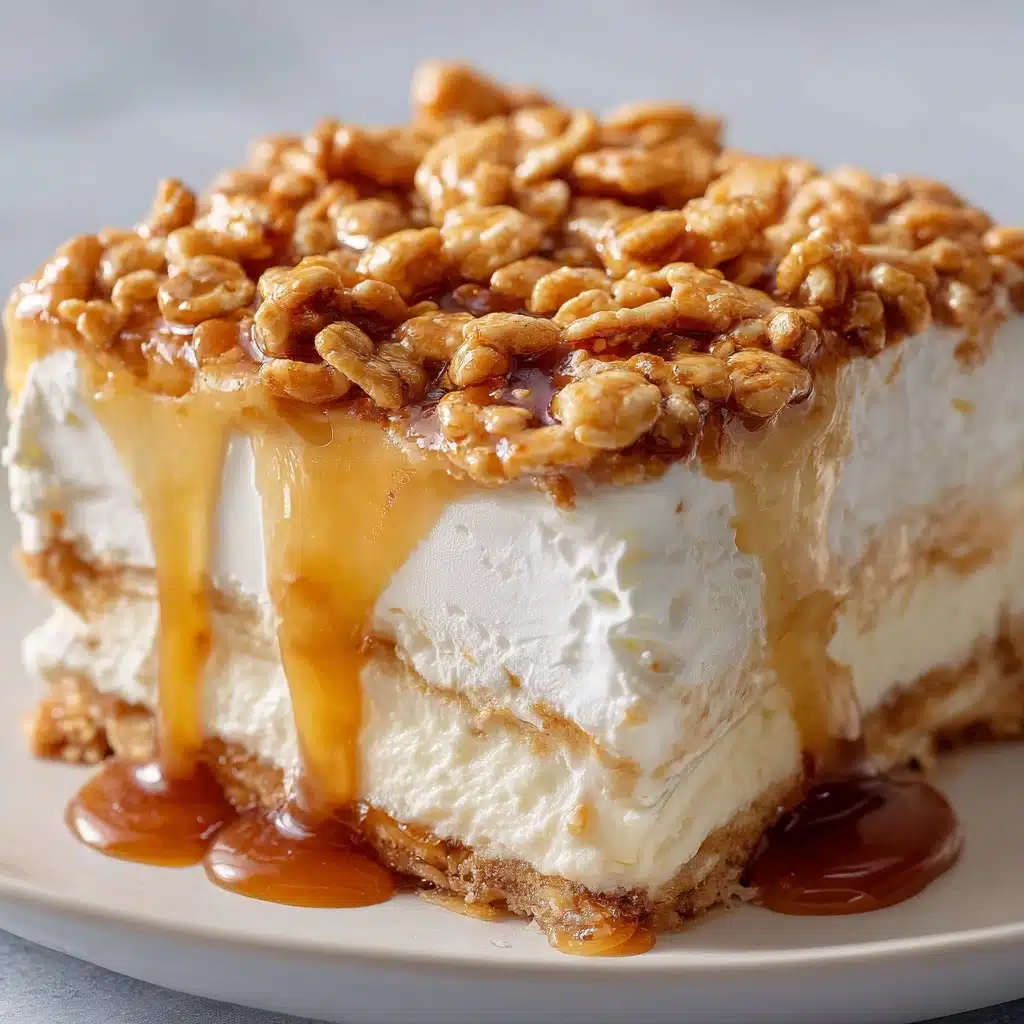
Imagine a dessert that captures the nostalgic magic of childhood Rice Krispie treats and transforms it into a rich, irresistible cheesecake. That’s exactly what you get with Rice Krispie Treat Cheesecake—a dreamy mashup of crunchy, gooey cereal crust topped with creamy, no-bake cheesecake filling. It’s playful, crowd-pleasing, and oh-so-easy to make, perfect for parties or just treating yourself to something truly special.
Ingredients You’ll Need
This recipe uses a handful of familiar ingredients, each bringing a signature texture or flavor to the table. Don’t underestimate their simplicity—each one helps make this Rice Krispie Treat Cheesecake seriously unforgettable.
- Rice Krispies cereal: The classic crisp texture forms a unique, crunchy crust that holds everything together with a delightful snap.
- Unsalted butter: Melted to bind the marshmallows and cereal, adding richness and flavor to every bite.
- Mini marshmallows: These melt down impossibly smooth, creating a gooey “glue” for the crust and infusing it with sweetness.
- Cream cheese: The star of the filling—be sure to use it softened so you get a silky, lump-free cheesecake layer.
- Granulated sugar: Balances the tanginess of cream cheese and adds just-right sweetness to the creamy filling.
- Vanilla extract: Brings out the best in both the marshmallow crust and the cheesecake, for that classic dessert vibe.
- Heavy whipping cream: Whipped to stiff peaks, this lightens and lifts the cheesecake filling for airy decadence.
- Powdered sugar: Helps stabilize and sweeten the whipped cream so your filling stays perfect, not runny.
- Optional toppings: Try extra Rice Krispies, chopped marshmallows, a drizzle of melted chocolate, or fluffy whipped cream for a fun and festive finishing touch.
How to Make Rice Krispie Treat Cheesecake
Step 1: Prepare Your Pan
Start by greasing a 9-inch springform pan with either butter or a spritz of nonstick spray. Don’t skip the edges—a little insurance now means your Rice Krispie Treat Cheesecake will pop out picture-perfect later.
Step 2: Make the Rice Krispie Crust
Grab your biggest saucepan and melt the butter over medium heat. Once melted, add in all those adorable mini marshmallows and stir constantly as they melt into a glossy, lump-free pool. Take the pan off the heat and immediately stir in the Rice Krispies cereal, working quickly to coat every last puff. Scoop the mixture into the prepared pan and, with greased hands or the back of a measuring cup, press it firmly across the bottom and just a bit up the sides. Let it cool completely—this is key for a sturdy crust that won’t melt under the cheesecake layer!
Step 3: Make the Cheesecake Filling
In a large mixing bowl, beat softened cream cheese and granulated sugar together until the mixture is dreamy, smooth, and creamy (scrape the bowl as needed). Mix in the vanilla extract next. In a separate, super-clean bowl, whip your heavy cream and powdered sugar together until stiff peaks form—this is your secret weapon for that light-as-air filling. Gently fold the whipped cream into the cream cheese mixture, taking care not to deflate all the air you just whisked in.
Step 4: Assemble the Cheesecake
Once your crust has cooled to the touch, scoop the cheesecake filling onto it and spread it out evenly, smoothing the top with a spatula. Cover the pan with plastic wrap and chill the whole thing for at least 4 hours, or overnight if you’re planning ahead. This gives the cheesecake time to set up perfectly.
Step 5: Garnish and Serve
When you’re ready to serve, unclasp the springform pan and lift out your cheesecake. Scatter on your favorite toppings—some extra crushed Rice Krispies for crunch, mini marshmallows for sweetness, or a drizzle of chocolate for a wow factor. Slice, serve chilled, and watch it disappear!
How to Serve Rice Krispie Treat Cheesecake
Garnishes
The fun with Rice Krispie Treat Cheesecake doesn’t stop at the recipe—get playful with your garnishes! Sprinkle extra crushed Rice Krispies for an echo of crispy crunch, pile on some mini marshmallows for a whimsical look, or swirl over a rich ganache or melted chocolate for deep, grown-up decadence. Homemade whipped cream dollops also make the slices look ultra-inviting.
Side Dishes
Since this cheesecake is delightfully rich and sweet, a side of fresh berries or a tart fruit salad balances things beautifully. If you’re feeling extra, serve with coffee or chilled milk—perfect for little ones and grown-ups alike! It also pairs wonderfully with a scoop of simple vanilla ice cream.
Creative Ways to Present
Turn your Rice Krispie Treat Cheesecake into portable party bites by slicing it into small squares for a dessert platter or brunch spread. For birthdays or celebrations, stack slices on a cake stand and top with sparklers or colorful sprinkles. Or, serve each slice in individual mason jars for a cute, mess-free picnic treat!
Make Ahead and Storage
Storing Leftovers
Rice Krispie Treat Cheesecake keeps well! Store leftover slices in an airtight container in the refrigerator for up to 4 days. The crust stays crisp thanks to the marshmallow “seal,” and the filling remains creamy and fresh.
Freezing
Got extra? Freeze individual slices wrapped well in plastic wrap and tucked into a freezer bag. Thaw them overnight in the fridge before serving. It’s perfect for prepping ahead for parties or unexpected dessert cravings!
Reheating
Because this is a chilled, no-bake dessert, there’s no reheating needed—just take your slice out of the fridge or let it thaw from the freezer. If you want to recreate that just-made texture, let it sit at room temperature for about 10 minutes before eating.
FAQs
Can I use regular marshmallows instead of mini marshmallows?
Absolutely! Simply chop regular marshmallows into smaller pieces so they melt down faster and more evenly. You’ll need the same total weight—about 10 ounces.
How do I prevent my Rice Krispie crust from sticking to the pan?
Make sure to generously grease your springform pan before pressing in the crust mixture. If you’re still worried, you can line the bottom with parchment paper for extra peace of mind!
What can I add to the cheesecake layer for more flavor?
Feel free to fold in mini chocolate chips, a swirl of peanut butter, or crushed Oreos for a fun twist. Just fold these extras in gently so the filling stays fluffy.
Can I make this dessert gluten-free?
Yes! Just pick a certified gluten-free crispy rice cereal and double-check that your other ingredients are gluten-free. The recipe stays just as easy and delicious.
Do I need a springform pan for Rice Krispie Treat Cheesecake?
A springform pan makes it easiest to remove and slice the cheesecake neatly, but a deep pie dish or loose-bottomed tart pan can also work in a pinch—as long as you line and butter it well.
Final Thoughts
If you love playful desserts and want an easy showstopper, make this Rice Krispie Treat Cheesecake the next time you celebrate. It’s the best of two sweet worlds—nostalgic, creamy, and sure to win hearts wherever it goes. Give it a try, and happy dessert-making!
Print
Rice Krispie Treat Cheesecake Recipe
- Total Time: 4 hours 30 minutes (including chilling)
- Yield: 10–12 servings 1x
- Diet: Vegetarian
Description
Indulge in a delightful treat with this Rice Krispie Treat Cheesecake recipe. A crunchy cereal crust filled with creamy cheesecake, topped with your favorite goodies!
Ingredients
For the crust:
- 5 cups Rice Krispies cereal
- 1/2 cup unsalted butter
- 1 (10 oz) bag mini marshmallows
For the cheesecake filling:
- 16 oz cream cheese, softened
- 1/2 cup granulated sugar
- 1 teaspoon vanilla extract
- 1 cup heavy whipping cream
- 1 tablespoon powdered sugar
For topping (optional):
- Crushed Rice Krispies
- Extra marshmallows
- Melted chocolate
- Whipped cream
Instructions
- Make the crust: Grease a 9-inch springform pan. Melt butter, add marshmallows, stir until smooth. Remove from heat, add Rice Krispies. Press into pan to form a crust. Let cool.
- Make the cheesecake filling: Beat cream cheese and sugar until smooth. Add vanilla. Whip cream and sugar until stiff. Fold into cream cheese. Spoon into crust.
- Serve: Garnish with desired toppings. Chill before serving.
Notes
- Ensure crust is cool before adding filling.
- For extra flavor, add chocolate chips or crushed Oreos.
- Prep Time: 25 minutes
- Cook Time: 5 minutes
- Category: Dessert
- Method: No-Bake
- Cuisine: American
Nutrition
- Serving Size: 1 slice
- Calories: 370
- Sugar: 24g
- Sodium: 180mg
- Fat: 24g
- Saturated Fat: 15g
- Unsaturated Fat: 8g
- Trans Fat: 0g
- Carbohydrates: 32g
- Fiber: 0g
- Protein: 4g
- Cholesterol: 65mg

