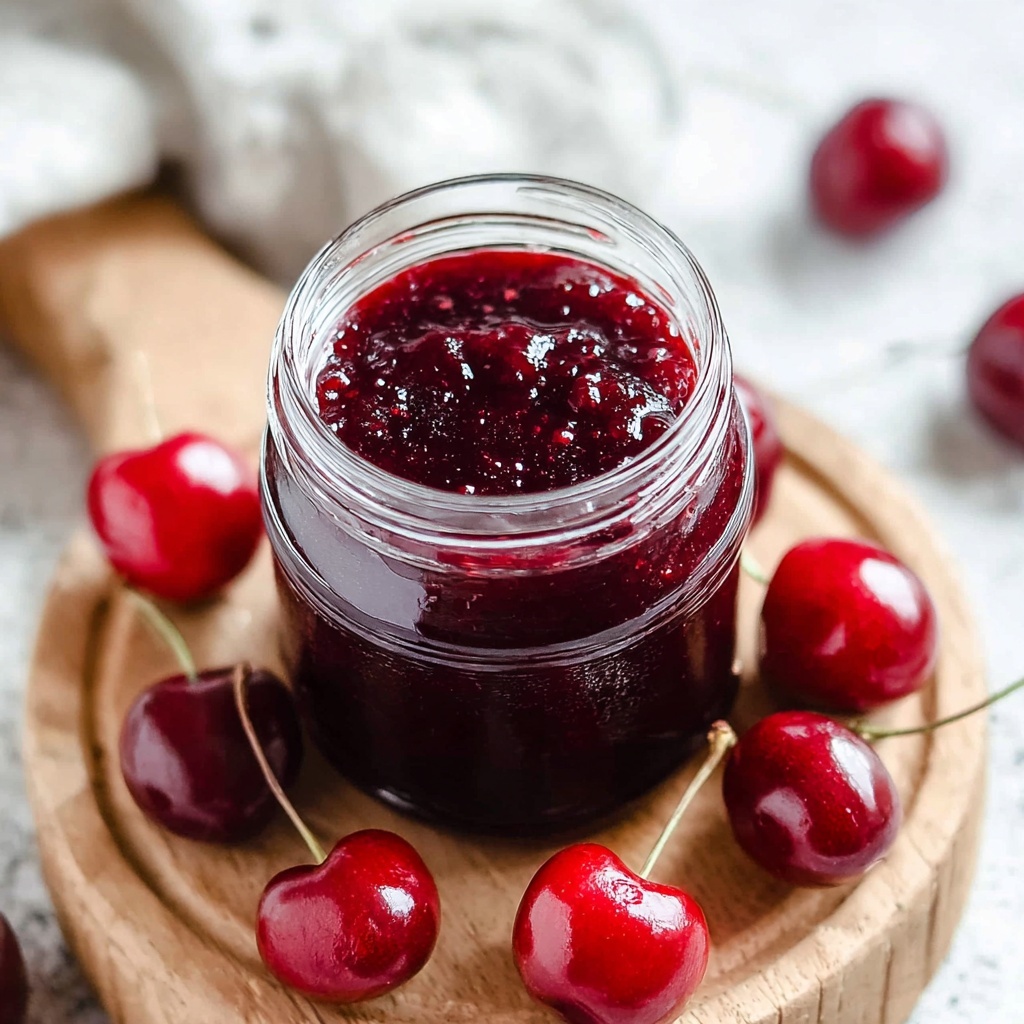
If you’ve ever dreamed of capturing the bright, juicy burst of summer cherries in a jar to enjoy year-round, this Cherry Jam Recipe is your new best friend. It’s a wonderful balance of sweet and tart, with a luscious, spreadable texture that makes everything from morning toast to afternoon tea a delight. By using fresh cherries, a touch of lemon juice, and the magic of fruit pectin, this homemade jam brings out the true essence of cherries in a way that store-bought simply can’t match. Prepare to fall in love with a recipe that’s as straightforward as it is scrumptious.
Ingredients You’ll Need
Simple, fresh ingredients make all the difference when it comes to creating delicious cherry jam. Each element plays a vital role in developing the perfect texture, vibrant color, and that irresistible flavor burst.
- 4 cups fresh cherries (pitted): The heart of the jam, providing natural sweetness and gorgeous red color.
- 1 ½ cups granulated sugar: Balances the tartness of cherries and helps preserve the jam.
- 2 tablespoons lemon juice (freshly squeezed): Adds brightness and pectin, essential for proper setting and enhancing flavor.
- 1 package (1.75 oz) fruit pectin: Ensures the jam thickens perfectly for that spreadable consistency.
How to Make Cherry Jam Recipe
Step 1: Prepare the Cherries
Start by washing your fresh cherries thoroughly to remove any dirt or debris. Pit them using a cherry pitter for ease, or carefully cut each cherry in half to remove the pits. The pitted cherries are the foundation of your jam, so taking this step seriously ensures a smooth texture without any unwanted seeds.
Step 2: Combine and Soak
In a large pot, combine the pitted cherries, sugar, and freshly squeezed lemon juice. Give everything a good stir so the sugar begins dissolving. Let this mixture rest for about 30 minutes. This soaking period allows the cherries to release their natural juices, setting the stage for that luscious, syrupy base that defines a perfect jam.
Step 3: Begin Cooking
Place the pot over medium heat and slowly bring the cherry mixture to a boil. Stir frequently to prevent any sticking or burning on the bottom. This slow heating helps meld the flavors and dissolve the sugar fully, transforming the raw cherry juice into a rich, fragrant syrup.
Step 4: Add the Fruit Pectin
Once the mixture reaches a boil, stir in the fruit pectin according to the package instructions. The pectin is crucial for helping the jam thicken without becoming overly stiff. Continue cooking until you reach a rolling boil that cannot be stirred down, which usually signifies the jam is nearing its perfect set.
Step 5: Test for Doneness
Test your jam’s readiness by applying a small spoonful to a cold plate. Let it cool for a moment, then gently push it with your finger. If the jam wrinkles and holds its shape rather than running, it’s ready to be jarred. This simple plate test is a foolproof way to know your jam won’t be too runny or too firm once cooled.
Step 6: Jar and Preserve
Ladle the hot jam carefully into sterilized jars. Seal them tightly and process the jars in a boiling water bath for 5 to 10 minutes to ensure preservation and safety. This step not only creates a vacuum seal but also helps your Cherry Jam Recipe last longer in your pantry.
How to Serve Cherry Jam Recipe
Garnishes
Enhance your serving presentation by adding fresh mint leaves or a thin lemon twist on the side of your dish. Not only do these garnishes add a splash of color, but they also refresh your palate with a subtle zing that pairs wonderfully with the rich cherry flavor.
Side Dishes
Cherry jam is incredibly versatile and pairs beautifully with an array of foods. Spread it over warm toast or flaky croissants for breakfast. It also makes a delightful companion to creamy cheeses like brie or goat cheese on a charcuterie board, elevating snacks into something special.
Creative Ways to Present
Think beyond the spoon and spread! Use your Cherry Jam Recipe as a stunning glaze for grilled meats or roasted vegetables to add a hint of sweetness and vibrant color. Another fun idea is swirling it into yogurt or oatmeal for a burst of natural fruit flavor that livens up your everyday breakfast bowl.
Make Ahead and Storage
Storing Leftovers
If you find yourself with leftover jam after your first jar, keep it refrigerated in an airtight container. Properly stored, it will stay fresh and flavorful for up to three weeks—plenty of time to enjoy that cherry goodness in a variety of dishes.
Freezing
For longer storage, cherry jam freezes beautifully. Pour it into freezer-safe containers, leaving some headspace for expansion. When you want to enjoy the jam, thaw it in the refrigerator overnight. Freezing won’t compromise the texture or taste of your Cherry Jam Recipe.
Reheating
If your jam becomes a bit too firm in the fridge or freezer, simply warm it gently in a saucepan over low heat. Stir continuously until it loosens up and regains its perfect spreadable consistency. Avoid high heat to preserve the fresh fruit flavor.
FAQs
Can I use frozen cherries for this Cherry Jam Recipe?
Absolutely! You can use frozen cherries if fresh ones aren’t available, but be sure to thaw and drain them beforehand. This helps remove excess water so your jam reaches the right consistency.
What is the purpose of lemon juice in cherry jam?
Lemon juice adds a bright tartness that balances the sweetness of cherries. It also contains natural pectin and acid which aid the jam in setting properly and improve preservation.
How long does homemade cherry jam last?
Properly canned jars stored in a cool, dark place can last up to a year unopened. Once opened, refrigerate and use within three weeks for the best flavor and safety.
Can I reduce the sugar in this Cherry Jam Recipe?
You can reduce sugar slightly, but keep in mind it affects both sweetness and preservation. Lower sugar may result in a runnier jam and shorter shelf life.
Is it necessary to sterilize jars when making jam?
Yes, sterilizing jars is important to prevent contamination and spoilage. It helps ensure your Cherry Jam Recipe stays fresh and safe to eat for months.
Final Thoughts
There’s something truly special about homemade cherry jam. This Cherry Jam Recipe is a beautiful way to capture a burst of fresh cherry flavor that’s perfect for spreading, spooning, and savoring year-round. Whether you’re an experienced preserve maker or a kitchen newbie, this recipe’s simplicity and delicious results will win you over instantly. Give it a try and start creating jars of joy today!
Print
Cherry Jam Recipe
- Prep Time: 15 minutes
- Cook Time: 30 minutes
- Total Time: 45 minutes
- Yield: 2 cups of cherry jam
- Category: Condiment
- Method: Stovetop
- Cuisine: American
- Diet: Vegetarian
Description
This easy homemade Cherry Jam recipe combines fresh cherries, sugar, lemon juice, and fruit pectin to create a sweet and tangy spread that’s perfect for toast, pastries, and desserts. With simple ingredients and straightforward steps, you can make delicious cherry jam at home in just around 45 minutes.
Ingredients
Cherry Jam Ingredients
- 4 cups fresh cherries, pitted
- 1 ½ cups granulated sugar
- 2 tablespoons freshly squeezed lemon juice
- 1 package (1.75 oz) fruit pectin
Instructions
- Prepare Cherries: Wash and pit the cherries thoroughly, either using a cherry pitter or by cutting them in half to remove the pits.
- Combine Ingredients: In a large pot, combine the pitted cherries, granulated sugar, and lemon juice. Stir the mixture well and let it sit for 30 minutes to allow the cherries to release their natural juices.
- Heat Mixture: Place the pot over medium heat and heat the mixture while stirring frequently until it begins to boil.
- Add Pectin and Boil: Once boiling, stir in the fruit pectin according to the package instructions. Continue to cook and stir until the mixture reaches a full rolling boil again.
- Test for Doneness: Use the cold plate test by placing a small spoonful of jam on a chilled plate. Push the jam with your finger; if it wrinkles and does not run, the jam is ready.
- Jar the Jam: Ladle the hot jam into sterilized jars, sealing them tightly. Then process the jars in a boiling water bath for 5 to 10 minutes to preserve the jam and ensure safety.
Notes
- Make sure to sterilize jars properly before filling to prevent spoilage.
- The cold plate test is a reliable way to check jam consistency without special equipment.
- You can adjust the sugar quantity slightly depending on the sweetness of your cherries.
- If you don’t have fresh cherries, frozen cherries can be used; thaw them first and drain excess liquid.
- Store opened jam in the refrigerator and consume within a few weeks for best quality.


