
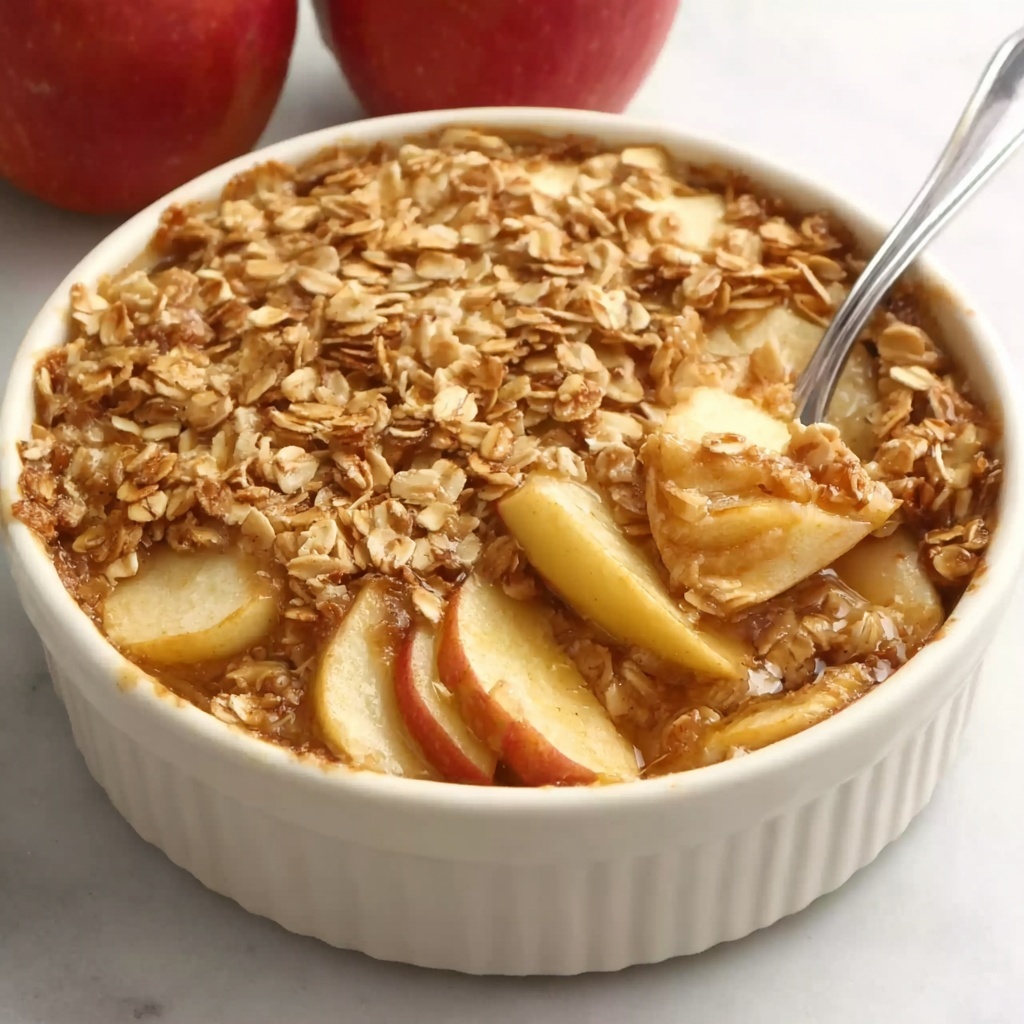
If you’ve ever wanted a comforting dessert that feels like a warm hug, you’re going to adore this Easy Apple Crisp Recipe. It’s a beautiful blend of tender, cinnamon-kissed apples with a crunchy, buttery oat topping that bakes into golden perfection. This recipe captures the essence of cozy fall flavors while being so straightforward you can whip it up on any weeknight or for a special gathering without breaking a sweat. Whether you’re a seasoned baker or just love simple sweets, this apple crisp is ready to claim its rightful place as your new favorite dessert!
Ingredients You’ll Need
Getting the perfect apple crisp starts with some simple, quality ingredients that work together to create layers of flavor and texture. Each component plays a crucial role, from the tartness of Granny Smith apples to the warm sweetness of cinnamon and brown sugar.
- 3 pounds apples (Granny Smith and Pink Lady recommended): A mix of tart and sweet apples gives the filling a balanced, lively flavor that holds up well during baking.
- ½ cup granulated sugar: Sweetens the fruit while helping to mellow the tartness of the apples.
- 1 tablespoon fresh lemon juice: Brightens the flavor and helps prevent the apples from browning prematurely.
- 1 tablespoon cornstarch: Thickens the apple filling to a luscious, juicy consistency without being runny.
- 2 teaspoons ground cinnamon: Adds that warm, fragrant spice that pairs beautifully with apples.
- ½ cup unsalted butter (or melted coconut oil for vegan option): Gives the crisp topping its irresistible rich and crumbly texture.
- 1 cup rolled oats: Adds hearty chewiness and a nice rustic touch to the topping.
- 1 cup all-purpose flour (or gluten-free 1:1 flour/almond flour): Creates the structure in the topping, balancing the oats perfectly.
- ⅓ cup packed brown sugar: Brings deep molasses notes and sweetness that caramelize beautifully as it bakes.
- 1 teaspoon cinnamon: Ties the topping flavors together with that cozy spice element.
- ¼ teaspoon salt: Enhances all the other flavors, preventing the dessert from feeling flat.
How to Make Easy Apple Crisp Recipe
Step 1: Preheat and Prepare the Baking Dish
Start by preheating your oven to 350°F (175°C), ensuring it’s nice and hot when you’re ready to bake. Lightly grease a 13×9-inch baking dish with cooking spray so your crisp won’t stick and will come out looking picture-perfect.
Step 2: Prepare the Apple Filling
Peel, core, and chop your apples into roughly 1-inch chunks. This size is perfect because they soften during baking but still keep a pleasant bite. Toss the apples with granulated sugar, fresh lemon juice, cornstarch, and cinnamon in a large bowl until every piece is beautifully coated. This mixture forms the juicy, flavorful base everyone will love.
Step 3: Spread the Apple Mixture
Transfer the apple filling evenly into your prepared baking dish. Spreading it out ensures that every bite gets that wonderful balance of tender fruit and crisp topping.
Step 4: Make the Crisp Topping
Melt the unsalted butter or coconut oil and set it aside. In a separate bowl, combine the rolled oats, flour, brown sugar, cinnamon, and salt. Stir in the melted butter until the mixture becomes crumbly, almost like coarse sand. This crumbly topping is what gives the dish its signature crisp texture.
Step 5: Assemble and Bake
Evenly sprinkle the crisp topping over the apple filling. Pop the dish into the preheated oven and bake for 50-60 minutes, or until the topping is golden brown and the apple filling is bubbling with warmth. Keep an eye on it — if the topping starts browning too fast, just cover it loosely with foil for the remainder of the baking time.
Step 6: Cool and Serve
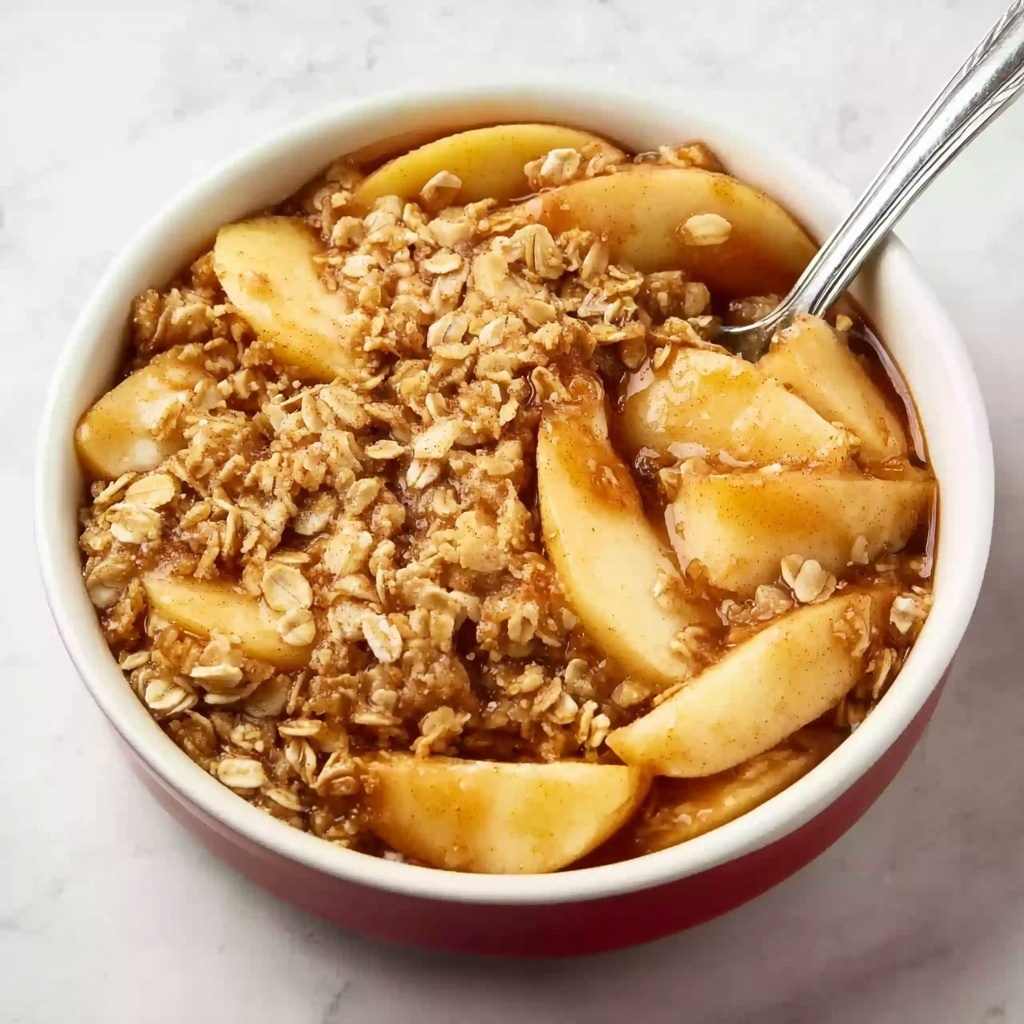
Once out of the oven, let your Easy Apple Crisp Recipe cool for at least 15 minutes. This resting time lets the filling set slightly so it’s not too runny. When ready, serve it warm with vanilla ice cream, fluffy whipped cream, or even a drizzle of caramel sauce for an extra-special touch.
How to Serve Easy Apple Crisp Recipe
Garnishes
A scoop of creamy vanilla ice cream melting into the warm apple crisp is pure bliss. For some extra fluffiness, a dollop of freshly whipped cream dusted with cinnamon makes this dessert feel truly festive. You can also sprinkle a handful of chopped toasted pecans or walnuts for a delightful nutty crunch.
Side Dishes
Apple crisp is versatile and pairs beautifully with so many flavors. Try serving it alongside a cup of hot spiced cider or a smooth latte to capture that cozy vibe. If you’re looking for a breakfast twist, enjoy it with a side of Greek yogurt or cottage cheese to balance the sweetness.
Creative Ways to Present
Think beyond the classic square and serve your apple crisp in individual ramekins for charming single portions at dinner parties. Layer it parfait-style with whipped cream and granola for a casual brunch offering. And for festive touches, add a sprinkle of edible gold dust or a cinnamon stick as a garnish to impress your guests.
Make Ahead and Storage
Storing Leftovers
Apple crisp tastes just as wonderful the next day, so store any leftovers in an airtight container in the refrigerator. It will stay fresh up to 4 days, making it an excellent dessert to prepare ahead of time for busy schedules.
Freezing
This Easy Apple Crisp Recipe also freezes beautifully. After baking and cooling completely, cover tightly with foil or plastic wrap and freeze for up to 3 months. When you’re ready, thaw overnight in the refrigerator and reheat.
Reheating
To enjoy leftover crisp, warm individual servings in the microwave for about 30-60 seconds or reheat the whole dish in a 350°F oven for 15-20 minutes until it’s hot and bubbly again. Adding a scoop of ice cream right after reheating makes it feel fresh and indulgent every time.
FAQs
Can I use other types of apples for this recipe?
Absolutely! While Granny Smith and Pink Lady apples provide an ideal balance of tartness and sweetness, feel free to experiment with Fuji, Honeycrisp, or Braeburn apples for slightly different flavors and textures.
Is there a gluten-free option for this Easy Apple Crisp Recipe?
Yes! You can swap the all-purpose flour for a gluten-free 1:1 baking flour or even almond flour. This makes the dish accessible for those avoiding gluten without sacrificing taste or texture.
Can I make this apple crisp vegan?
Definitely! Replace the unsalted butter with melted coconut oil or a vegan butter substitute. It won’t change the deliciousness and keeps the topping perfectly crumbly and rich.
How do I prevent the topping from getting soggy?
Make sure to evenly distribute the crisp topping and bake until golden brown. If your topping browns too quickly, loosely cover it with foil to prevent burning while allowing the apples underneath to cook through fully.
Can I add other fruits to this recipe?
For sure! Pears, berries, or peaches can be added to the apple filling or used on their own to mix things up. Just adjust the sugar and lemon juice slightly depending on the fruit’s sweetness and acidity.
Final Thoughts
Making this Easy Apple Crisp Recipe is like inviting a little bit of warmth and happiness into your kitchen. It’s one of those all-time favorites that makes every bite feel cozy and satisfying, whether after a bustling day or during a relaxed weekend. So go ahead, grab those apples, and dive in — your new go-to dessert awaits!
Print
Easy Apple Crisp Recipe
- Prep Time: 15 minutes
- Cook Time: 55 minutes
- Total Time: 1 hour 10 minutes
- Yield: 8 servings
- Category: Dessert
- Method: Baking
- Cuisine: American
- Diet: Gluten Free
Description
This Easy Apple Crisp recipe features tender, cinnamon-spiced apples baked under a buttery, oat-based crisp topping. It’s a comforting dessert perfect for cozy nights and easily adaptable for vegan and gluten-free diets. The balance between tart apples and sweet crumble makes every bite deliciously satisfying.
Ingredients
Apple Filling
- 3 pounds apples (Granny Smith and Pink Lady recommended)
- ½ cup granulated sugar
- 1 tablespoon fresh lemon juice
- 1 tablespoon cornstarch
- 2 teaspoons ground cinnamon
Crisp Topping
- ½ cup unsalted butter (or melted coconut oil for vegan option)
- 1 cup rolled oats
- 1 cup all-purpose flour (or gluten-free 1:1 flour/almond flour)
- ⅓ cup packed brown sugar
- 1 teaspoon cinnamon
- ¼ teaspoon salt
Instructions
- Preheat & Prep: Preheat the oven to 350°F (175°C) and lightly grease a 13×9-inch baking dish with cooking spray to prevent sticking.
- Prepare the Apple Filling: Peel, core, and chop the apples into 1-inch chunks for even cooking and texture.
- Mix the Apple Filling: In a large bowl, combine the chopped apples, granulated sugar, fresh lemon juice, cornstarch, and cinnamon. Stir well until the apples are evenly coated with the mixture.
- Spread Filling: Transfer and spread the apple mixture evenly into the prepared baking dish, ensuring a uniform layer for baking.
- Make the Crisp Topping: Melt the unsalted butter or coconut oil. In a separate bowl, mix rolled oats, all-purpose flour, brown sugar, cinnamon, and salt together.
- Combine Topping Ingredients: Pour the melted butter into the oat mixture and stir until crumbly and well combined, forming the crisp topping.
- Assemble & Bake: Evenly sprinkle the crumbly topping over the apple filling in the baking dish.
- Bake: Place the dish in the preheated oven and bake for 50-60 minutes until the topping is golden brown and the apple filling is bubbly. Cover loosely with foil if the topping browns too quickly.
- Cool: Remove from the oven and let the apple crisp rest for at least 15 minutes to set before serving.
- Serve: Enjoy warm, optionally served with vanilla ice cream, whipped cream, or caramel sauce for extra indulgence.
Notes
- Use a mix of tart and sweet apples such as Granny Smith and Pink Lady for balanced flavor and texture.
- To make this recipe vegan, substitute butter with melted coconut oil.
- For a gluten-free version, use a 1:1 gluten-free flour blend or almond flour instead of all-purpose flour.
- Resting the crisp before serving allows the juices to thicken, improving texture and flavor.
- If the crisp topping browns too fast during baking, cover loosely with foil to prevent burning.
- This dessert pairs wonderfully with vanilla ice cream or whipped cream for extra richness.


