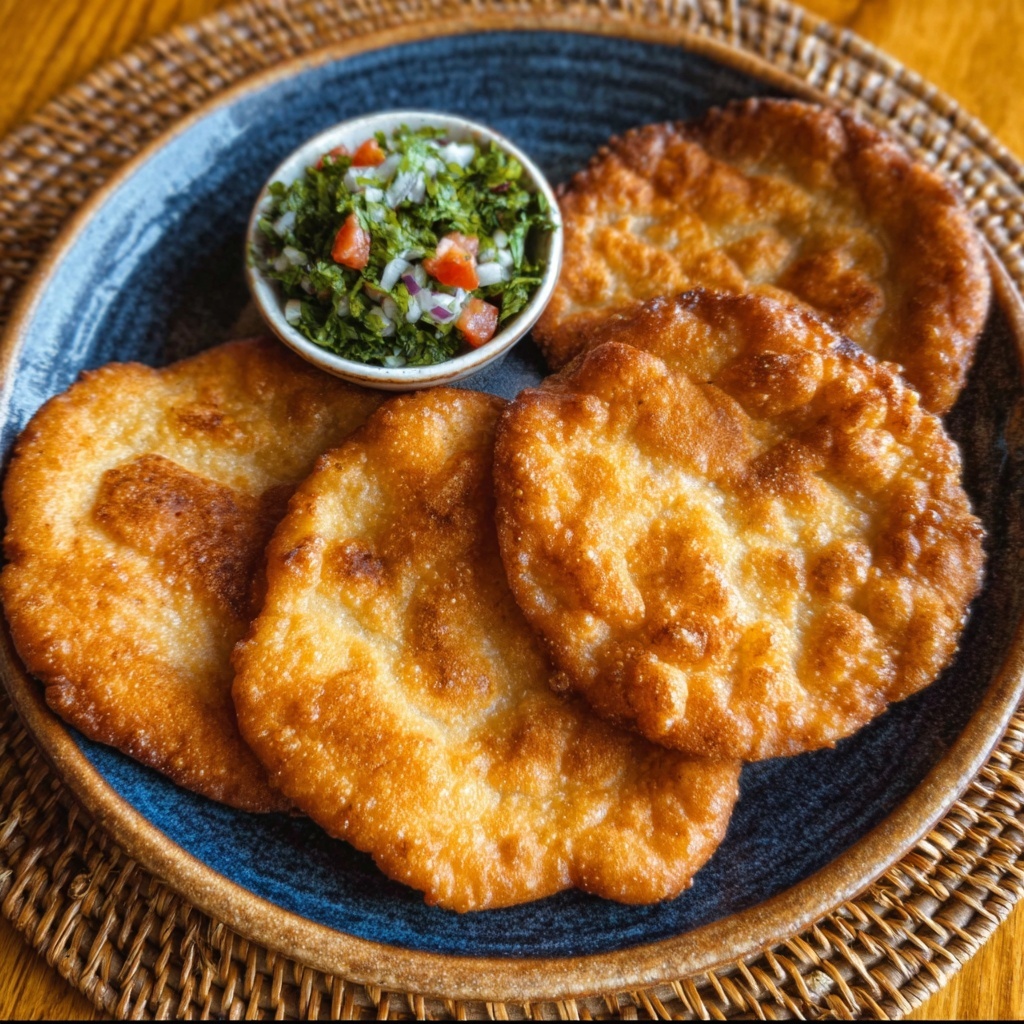
There is something truly special about homemade fry bread—the way it puffs up golden and crispy on the outside while staying soft and chewy inside. If you’ve ever wanted to make this beloved treat yourself, you’re in luck. This Easy Indigenous Fry Bread (Bannock) Recipe takes the guesswork out of the process and uses simple ingredients that come together quickly to deliver that authentic, comforting flavor. It’s perfect for a casual snack, a side to hearty meals, or just because you deserve something delicious and warm fresh from the skillet.
Ingredients You’ll Need
What’s so great about this recipe is how straightforward and accessible the ingredients are. Each one plays a crucial role in creating the perfect texture—from the fluffiness provided by baking powder to the subtle richness from the oil or butter. Here’s what you’ll need:
- 2 cups all-purpose flour: The base of the dough, providing structure and that familiar chewiness.
- 1 tablespoon baking powder: Helps the bread puff up and stay light rather than dense.
- 1 teaspoon salt: Balances flavor and enhances the natural taste of the flour.
- 1 tablespoon sugar (optional): Adds a touch of sweetness, but you can leave it out if you prefer savory.
- 2 tablespoons vegetable oil or melted butter: Brings richness and moisture to the dough for a tender crumb.
- 3/4 cup water (adjust as needed): Binds everything together into a dough that’s soft but manageable.
- Oil for frying: You’ll need enough to shallow fry the bread until golden and irresistibly crispy.
How to Make Easy Indigenous Fry Bread (Bannock) Recipe
Step 1: Whisk Dry Ingredients
Start by combining your flour, baking powder, salt, and sugar (if you’re using it) in a large bowl. Whisking them together ensures that the rising agent and seasonings are evenly distributed, which is key for consistent texture and flavor throughout your bannock.
Step 2: Add the Oil or Butter
Next, stir in the vegetable oil or melted butter. This step transforms the mixture to resemble coarse crumbs. This crumbly texture is what creates flakes in the bread once fried, adding to that delightful contrast of crispiness and tenderness.
Step 3: Mix in Water
Slowly pour in water while stirring gently. You want to form a soft dough that isn’t too sticky or too dry. This part might require a little adjusting—add a splash more water if the dough feels stiff, or a dusting more flour if it’s too wet.
Step 4: Knead the Dough
Turn the dough out onto a lightly floured surface and knead it gently for about a minute. The goal here is to smooth out the dough without overworking it, which keeps your fry bread tender instead of tough.
Step 5: Rest the Dough
Let the dough rest for 10 to 15 minutes. This little pause relaxes the gluten, making it easier to shape the dough and ensuring the bread will puff up nicely when fried.
Step 6: Shape into Discs
Divide the dough into six equal portions. Flatten each piece into a disc about half an inch thick. Aim for uniform sizes so that each piece cooks evenly and beautifully golden.
Step 7: Heat the Oil
In a large skillet, heat enough oil over medium heat so it’s hot enough to sizzle your dough discs immediately when placed in. Proper temperature is crucial to achieve that perfect balance between a crispy outside and a soft inside.
Step 8: Fry the Bread
Carefully place the flattened dough discs into the hot oil, working in batches if needed to avoid overcrowding. Fry for about 2 to 3 minutes on each side, until each piece is golden brown and cooked through.
Step 9: Drain and Serve
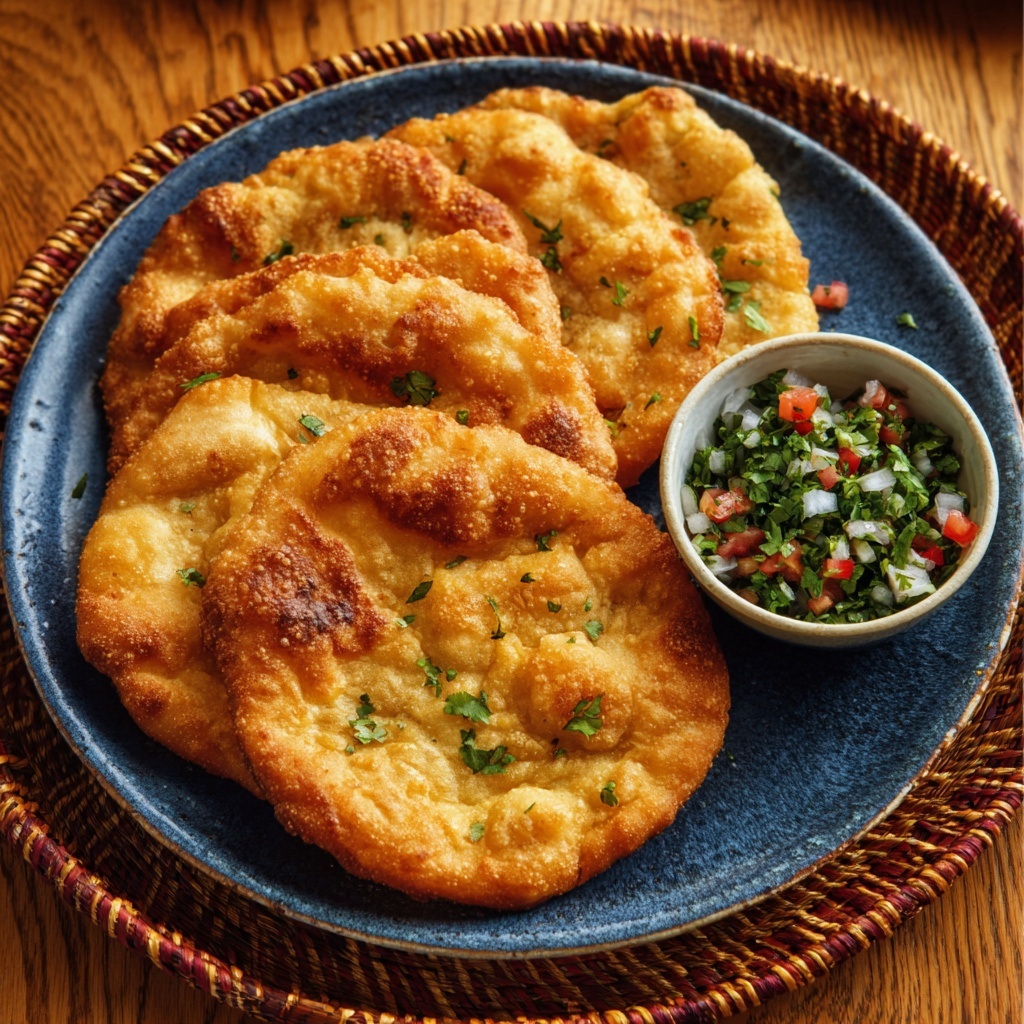
Once cooked, transfer the fry bread to paper towels to drain excess oil. Serve it warm so you can enjoy that irresistible combination of textures and flavors at their peak.
How to Serve Easy Indigenous Fry Bread (Bannock) Recipe

Garnishes
One of the best things about this easy Indigenous fry bread (bannock) recipe is how versatile it is when it comes to toppings. For a sweet touch, try slathering warm pieces with honey, jam, or powdered sugar. If savory is your preference, sour cream, chili, beans, or even a sprinkle of shredded cheese can elevate your fry bread into a satisfying meal or snack.
Side Dishes
Bannock pairs beautifully with many dishes, adding a hearty dose of comfort. It’s excellent alongside soups and stews, soaking up rich broths and sauces. Traditionally, it complements hearty mains like roasted meats or vegetable chili perfectly, making it an ideal companion to any rustic, home-cooked feast.
Creative Ways to Present
Don’t hesitate to get creative with presentation! Stack individual pieces into a bread basket lined with a colorful cloth, or cut into wedges to serve as dipping bites with a variety of sauces. You can also stuff the fry bread with savory fillings for a handheld treat that’s perfect for casual gatherings or lunches on the go.
Make Ahead and Storage
Storing Leftovers
If you have any fry bread leftover, simply let it cool completely and store it in an airtight container at room temperature. It will keep well for about 1 to 2 days, retaining much of its freshness and delightful texture.
Freezing
For longer storage, you can freeze the fry bread. Wrap each piece tightly in plastic wrap and place them in a freezer-safe bag. This way, your easy Indigenous fry bread (bannock) recipe stays ready for future cravings and can last up to 2 months.
Reheating
To bring frozen or stored fry bread back to life, reheat it in a skillet over medium heat with a little oil until crisp and warmed through. You can also use a toaster oven for convenience—just be sure to watch it closely to avoid over-browning.
FAQs
Can I use whole wheat flour instead of all-purpose flour?
Absolutely! Whole wheat flour can add a nuttier flavor and a bit more density to your fry bread. You might want to experiment by replacing half of the all-purpose flour at first to maintain some lightness.
Why is my fry bread dense instead of fluffy?
This usually happens if the dough is over-kneaded or if there isn’t enough baking powder. Make sure you only knead gently and use fresh baking powder for the best puff and texture.
Can I bake this bannock instead of frying it?
Yes, you can bake the dough on a greased baking sheet at 375°F for about 15-20 minutes until golden, but frying is traditional and gives the characteristic crispy exterior that makes this recipe so special.
Is this recipe suitable for vegetarians?
Definitely! This recipe is vegetarian-friendly as it uses no animal products unless you opt for butter. You can use vegetable oil to keep it completely plant-based.
Can I add flavorings to the dough?
Yes, feel free to mix in herbs, garlic powder, or spices to customize your fry bread. Just keep additions moderate so they don’t interfere with the frying process or texture.
Final Thoughts
There is nothing quite like the joy that comes from making your own easy Indigenous fry bread (bannock) recipe at home. It’s a warm, inviting treat that brings a little tradition and comfort to your table with every bite. So grab your ingredients, try this simple recipe, and savor the delicious results—you just might find yourself coming back to it time and time again.
Print
Easy Indigenous Fry Bread (Bannock) Recipe
- Prep Time: 10 minutes
- Cook Time: 15 minutes
- Total Time: 30 minutes
- Yield: 6 servings
- Category: Bread
- Method: Frying
- Cuisine: Indigenous North American
Description
Bannock, also known as Indigenous Fry Bread, is a simple and traditional recipe made with basic pantry ingredients. This easy-to-make fry bread has a crispy golden exterior and a soft, fluffy interior. Perfect as a snack or a base for both sweet and savory toppings, bannock can be served with honey, jam, chili, or beans, making it a versatile dish for any meal or occasion.
Ingredients
Dry Ingredients
- 2 cups all-purpose flour
- 1 tablespoon baking powder
- 1 teaspoon salt
- 1 tablespoon sugar (optional)
Wet Ingredients
- 2 tablespoons vegetable oil or melted butter
- 3/4 cup water (adjust as needed)
For Frying
- Oil for frying (such as vegetable or canola oil, enough to fill skillet about 1 inch deep)
Instructions
- Mix Dry Ingredients: Whisk together the flour, baking powder, salt, and sugar (if using) in a large bowl until all ingredients are well combined.
- Add Fat: Incorporate the vegetable oil or melted butter into the dry mixture, stirring until the mixture resembles coarse crumbs.
- Form Dough: Slowly pour in the water while mixing until a soft dough forms. Adjust the water amount as needed to achieve the right consistency.
- Knead Dough: Transfer the dough to a lightly floured surface and knead gently for about one minute until smooth and elastic.
- Rest Dough: Let the dough rest for 10-15 minutes to relax the gluten, which helps improve texture.
- Shape Bannock: Divide the dough into six equal portions and flatten each piece into a disk about half an inch thick.
- Heat Oil: In a large skillet, heat oil over medium heat until hot enough for frying (around 350°F or until a small piece of dough bubbles immediately).
- Fry Bannock: Carefully place the dough discs into the skillet, frying in batches if needed to avoid overcrowding.
- Cook Both Sides: Fry each side for approximately 2-3 minutes or until golden brown and cooked through, flipping once to ensure even cooking.
- Drain Excess Oil: Remove the fried bannock from skillet and set on paper towels to drain any excess oil.
- Serve Warm: Serve the bannock warm with your choice of toppings such as honey, jam, chili, or beans for a delicious meal or snack.
Notes
- You can adjust water as needed depending on your flour’s absorption to ensure a soft but workable dough.
- Use a thermometer to ensure the oil is at correct frying temperature for best results and less oil absorption.
- For a richer flavor, substitute vegetable oil with melted butter in the dough or for frying.
- Leftover bannock can be reheated in a skillet or oven to restore crispiness.
- Try topping with savory ingredients for a hearty meal or sweet toppings for a delightful treat.


