
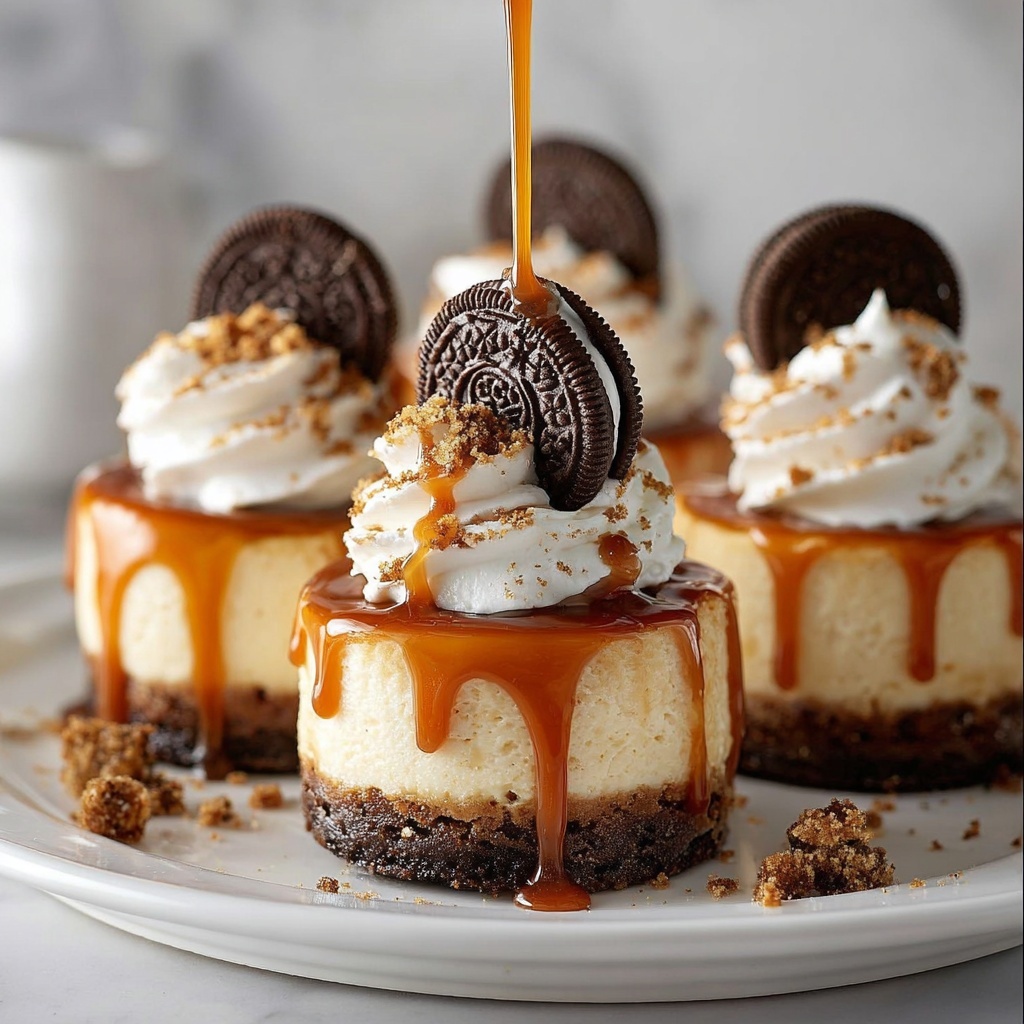
If you’re a fan of rich, creamy desserts with a delightful surprise inside, then these Mini Rolo Cheesecakes: The Ultimate Bite-Sized Dessert Recipe are going to steal your heart. Each tiny cheesecake boasts a silky smooth cream cheese filling atop a crisp chocolate wafer crust, crowned with a gooey, irresistible Rolo candy that melts just right. Perfect for parties, special treats, or whenever you need a little bite of happiness, these mini cheesecakes combine simplicity and indulgence in every single mouthwatering piece.
Ingredients You’ll Need
Gathering just the right ingredients is half the fun and ensures your Mini Rolo Cheesecakes come out perfectly every time. Each component adds a unique texture, sweetness, or flavor that plays off beautifully for a balanced, luscious dessert.
- Chocolate wafer crumbs: The crunchy base that offers a chocolaty contrast to the creamy filling.
- Unsalted butter, melted: Binds the crust together and adds richness without overpowering flavors.
- Granulated sugar: Sweetens both the crust and the cheesecake filling for balanced sweetness.
- Cream cheese, softened: The heart of the cheesecake, delivering that iconic smooth texture.
- Large eggs: Help set the cheesecake while keeping it tender and airy.
- Vanilla extract: Adds warmth and depth to the filling’s flavor.
- Heavy cream: Brings extra creaminess and a velvety mouthfeel to the filling.
- Rolo candies, unwrapped: The crowning jewel that melts to a luscious caramel center.
- Optional sea salt flakes: A sprinkle heightens the sweet and salty harmony for that gourmet touch.
How to Make Mini Rolo Cheesecakes: The Ultimate Bite-Sized Dessert Recipe
Step 1: Prepare the Crust
Start by preheating your oven to 325°F (160°C). In a medium bowl, mix together your chocolate wafer crumbs, melted butter, and sugar until they form a crumbly but cohesive mixture. This crust will provide the sturdy, chocolatey foundation your cheesecakes deserve. Line a 24-cup mini muffin tin with paper liners and press about a tablespoon of the crumb mixture into each cup. Pop them in the oven to bake for 5 minutes, then remove and set aside to cool just a bit.
Step 2: Make the Cheesecake Filling
While your crusts chill, it’s time to whip up that creamy filling. Using an electric mixer, beat the softened cream cheese until silky smooth. Slowly add sugar, continuing to beat until fully incorporated. Then, break in the eggs one by one, making sure each is well mixed before adding the next. Stir in the vanilla extract and heavy cream for that extra luscious texture. Keep mixing until everything is just combined; over-beating can add unwanted air bubbles.
Step 3: Assemble and Bake
Carefully pour the cheesecake filling over your slightly cooled crusts, filling them nearly to the top. Bake for 15 to 18 minutes until the edges are firm but the centers remain a little jiggly—that’s the perfect cheesecake doneness! Let them sit in the pan for about 15 minutes, then transfer the mini cheesecakes to a wire rack to cool completely. This gentle cooling helps prevent cracks and keeps the texture just right.
Step 4: Add the Rolo Topping
Now for the fun part. Gently press one unwrapped Rolo candy into the center of each mini cheesecake. Pop the tray in the microwave for a few seconds—just enough to soften the Rolos so they melt slightly into the cheesecake. Allow them to cool completely to set, and if you’re feeling fancy, sprinkle a pinch of sea salt flakes over each for that perfect balance of sweet and salty. These finishing touches elevate the Mini Rolo Cheesecakes: The Ultimate Bite-Sized Dessert Recipe to a whole new level.
Step 5: Chill and Serve
Refrigerate your cheesecakes for at least two hours. This resting period lets the flavors marry and the texture firm up, making them easier to peel from the liners and simply delightful to eat. When you’re ready, gently peel away the paper liners and prepare for oohs and ahhs as everyone bites into these luscious treats.
How to Serve Mini Rolo Cheesecakes: The Ultimate Bite-Sized Dessert Recipe

Garnishes
While the Mini Rolo Cheesecakes are stunning on their own, a few simple garnishes can boost their visual and flavor appeal. Try adding a light dusting of cocoa powder, a drizzle of chocolate sauce, or a sprinkle of chopped nuts. Fresh mint leaves or a tiny dollop of whipped cream also make these little desserts look party-ready.
Side Dishes
Since these cheesecakes are rich and sweet, pairing them with fresh fruit like raspberries or strawberries adds a refreshing contrast. A scoop of vanilla ice cream or a light fruit sorbet on the side also complements the caramel and chocolate notes, making dessert time an unforgettable experience.
Creative Ways to Present
If you want to impress your guests, consider serving these Mini Rolo Cheesecakes on a beautiful tiered dessert stand or place them inside mini clear cups for a fun twist. You can also arrange them on a board with other bite-sized sweets for a varied dessert platter. Personalized toothpicks or tiny flags add an extra dash of charm for celebrations and get-togethers.
Make Ahead and Storage
Storing Leftovers
Leftover Mini Rolo Cheesecakes keep beautifully when stored in an airtight container in the refrigerator. This helps maintain their texture and freshness for up to 4 days, making these treats perfect for making ahead or enjoying as unexpected snacks throughout the week.
Freezing
To freeze, place the mini cheesecakes on a baking sheet lined with parchment and freeze until solid. Then transfer them to a freezer-safe container or bag. They can last up to 2 months frozen without losing their charm. When ready to enjoy, thaw them overnight in the fridge.
Reheating
Since these are best enjoyed chilled, reheating is generally not recommended. If you prefer them slightly softer, allow them to sit at room temperature for 15–20 minutes before serving. This subtle warming helps the caramel topping stay deliciously gooey without melting off completely.
FAQs
Can I use a different candy instead of Rolos?
Absolutely! While Rolos have that perfect caramel and chocolate combo, you can get creative with other chewy chocolates like caramel-filled chocolates or even mini peanut butter cups for a different twist.
Do I need to use paper liners for the mini muffin tin?
Paper liners make it much easier to remove the cheesecakes without breaking them and keep serving simple. If you prefer, you can grease the tin very well, but liners are highly recommended for best results.
Is it possible to make these gluten-free?
Yes! Simply substitute the chocolate wafer crumbs with a gluten-free cookie crumb alternative to keep the rich texture and chocolate flavor intact.
How long does chilling the cheesecakes improve the flavor?
Chilling for at least two hours is ideal to let the flavors meld and the texture set perfectly. However, overnight chilling can enhance the depth of flavor even more.
Can I double the recipe for a larger batch?
Definitely! Just double all ingredients and bake in multiple 24-cup mini muffin tins if necessary. Keep an eye on baking times as ovens may vary slightly.
Final Thoughts
There’s something truly magical about Mini Rolo Cheesecakes: The Ultimate Bite-Sized Dessert Recipe that makes dessert feel like a celebration in every bite. Whether you’re treating yourself or making them for friends and family, these little cheesecakes are guaranteed to bring smiles and satisfied cravings. So go ahead, gather your ingredients, and dive into making this delightful recipe—a sweet experience you’ll want to enjoy again and again.
Print
Mini Rolo Cheesecakes: The Ultimate Bite-Sized Dessert Recipe
- Prep Time: 20 minutes
- Cook Time: 23 minutes
- Total Time: 4 hours 23 minutes
- Yield: 24 mini cheesecakes
- Category: Dessert
- Method: Baking
- Cuisine: American
Description
Discover the perfect bite-sized indulgence with these Mini Rolo Cheesecakes. Featuring a rich chocolate wafer crust, creamy cheesecake filling, and topped with gooey melted Rolo candies, these decadent treats are easy to make and perfect for any occasion. With a hint of sea salt to balance the sweetness, they are sure to satisfy your dessert cravings in just a few simple steps.
Ingredients
Crust
- 1 ½ cups chocolate wafer crumbs (about 36 wafers)
- 5 tablespoons unsalted butter, melted
- 2 tablespoons granulated sugar
Cheesecake Filling
- 24 ounces cream cheese, softened to room temperature
- ¾ cup granulated sugar
- 2 large eggs
- 2 teaspoons vanilla extract
- ¼ cup heavy cream
Topping
- 48 Rolo candies, unwrapped
- Optional: Sea salt flakes, for sprinkling
Instructions
- Prepare the Crust: Preheat your oven to 325°F (160°C). This ensures the oven reaches the right temperature for baking the crusts evenly.
- Mix Crust Ingredients: In a medium bowl, combine the chocolate wafer crumbs, melted unsalted butter, and 2 tablespoons granulated sugar. Stir thoroughly until the mixture is evenly moistened and crumbly.
- Prepare Muffin Tin: Line a 24-cup mini muffin tin with paper liners to prevent sticking and ease removal of the cheesecakes.
- Form Crust Bases: Press about 1 tablespoon of the chocolate crumb mixture firmly into the bottom of each paper-lined muffin cup to create a compact crust base.
- Bake Crusts: Place the muffin tin in the oven and bake the crusts for 5 minutes. Once done, remove from the oven and allow them to cool slightly while you prepare the filling.
- Make Cheesecake Filling: In a large mixing bowl, beat the softened cream cheese with an electric mixer until smooth and creamy, free of lumps.
- Add Sugar: Gradually incorporate ¾ cup granulated sugar into the cream cheese, mixing thoroughly until fully blended and smooth.
- Incorporate Eggs: Add the eggs one at a time, beating well after each addition to ensure a smooth, homogeneous filling.
- Add Flavor and Cream: Stir in 2 teaspoons vanilla extract and ¼ cup heavy cream, mixing just until combined to maintain a light texture.
- Assemble Cheesecakes: Pour the cheesecake filling evenly over the cooled crusts in each muffin liner, filling them almost to the top but leaving a small gap to prevent overflow.
- Bake Cheesecakes: Return the muffin tin to the oven and bake for 15-18 minutes. The edges should be set, but the center will remain slightly jiggly, indicating perfect doneness.
- Cool Initially: Remove the cheesecakes from the oven and let them cool in the tin for 15 minutes to stabilize.
- Cool Completely: Transfer the cheesecakes to a wire rack to cool completely, which helps them set properly before adding toppings.
- Add Rolo Toppings: Press one unwrapped Rolo candy gently into the center of each cooled cheesecake.
- Soften Rolos: Microwave the cheesecakes briefly for a few seconds to soften the Rolo candies slightly, allowing them to melt just enough to meld with the cheesecake.
- Set Rolos: Allow the Rolos to cool and firm up again. If desired, sprinkle the tops with a pinch of sea salt flakes to enhance flavor and contrast the sweetness.
- Chill: Refrigerate the mini cheesecakes for at least 2 hours to fully set and develop flavor.
- Serve: Before serving, gently peel away the paper liners from each cheesecake for a clean presentation. Enjoy your delicious Mini Rolo Cheesecakes!
Notes
- Use room temperature cream cheese to ensure a smooth, lump-free filling.
- Press the crust firmly for a compact base that holds together well.
- Microwaving the Rolos softly helps them melt just enough to blend with the cheesecake without losing shape.
- Chilling the cheesecakes for a minimum of 2 hours is essential for the best texture and flavor.
- Optional sprinkling of sea salt flakes provides a delightful sweet-salty contrast.
- Store leftovers in the refrigerator for up to 3 days for optimal freshness.


