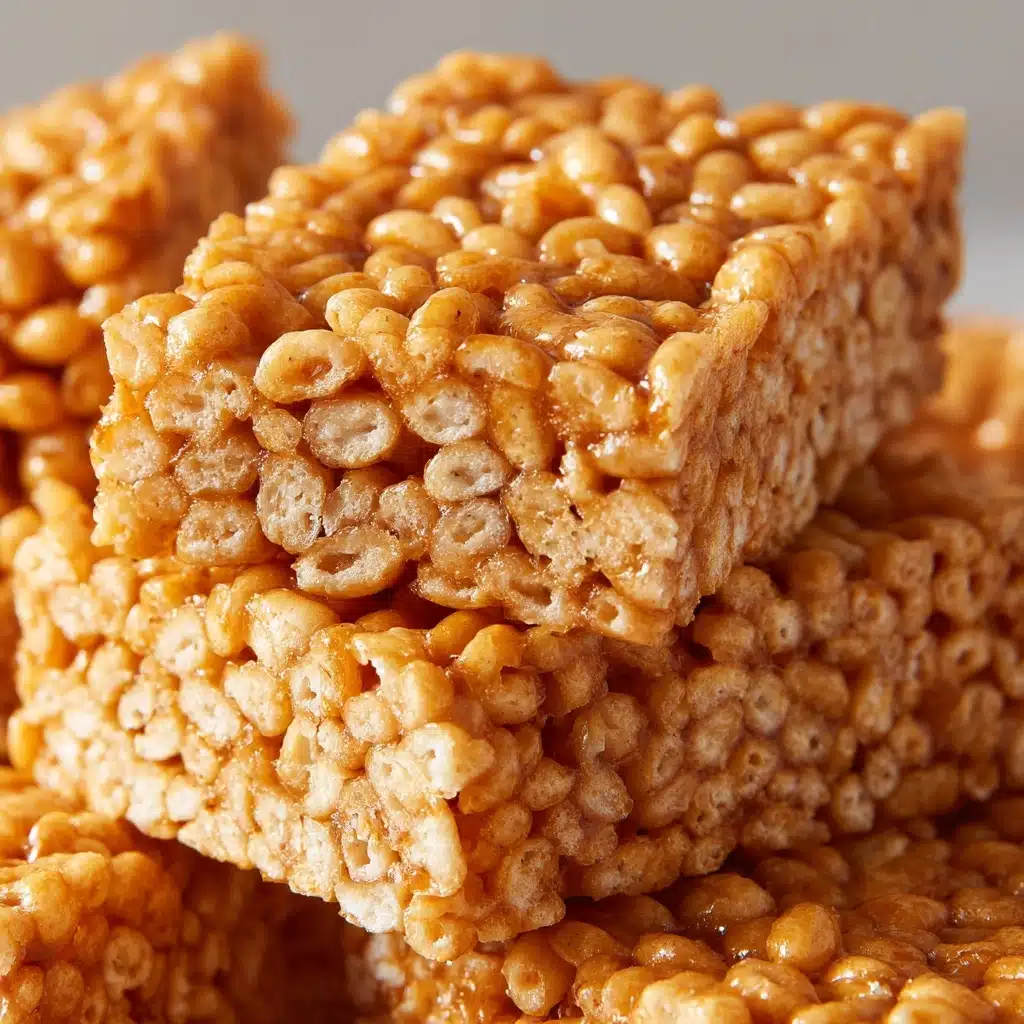
Sweet, chewy, and packed with the nostalgic crunch you crave, Peanut Butter Rice Krispie Treats are the ultimate no-bake goodie for busy days, family gatherings, or just pure snacking bliss. This classic treat gets a delicious upgrade with creamy peanut butter, bringing a perfect balance of salty-sweet flavor that makes each bite totally irresistible. Whether you drizzle them with chocolate or enjoy them plain, you’ll fall in love with this easy recipe that comes together in minutes and wows every crowd!
Ingredients You’ll Need
Ingredients You’ll Need
What makes Peanut Butter Rice Krispie Treats so special is how a handful of fridge and pantry staples come together, working some snack-time magic. Each ingredient plays its part to build layers of texture and flavor—you’ll want to get cozy with these simple, on-hand heroes.
- Unsalted butter: Adds rich flavor and keeps your treats perfectly tender (salted works in a pinch, just skip the extra salt!).
- Creamy peanut butter: The star ingredient! It brings that nutty flavor and extra chew we all crave—use smooth, well-stirred peanut butter for best results.
- Mini marshmallows: Melt down into a sweet, sticky base that holds everything together; mini size guarantees quick, even melting.
- Rice Krispies cereal: Crunchy, airy, and lightweight, these classic puffs keep your bars satisfyingly crispy.
- Vanilla extract: Just half a teaspoon adds amazing depth and warmth to the treats—don’t skip it!
- Pinch of salt: Amplifies all the flavors and balances the sweetness with a subtle savory note.
- Optional topping (melted chocolate or extra peanut butter): Drizzle over the top for an extra layer of indulgence and a wow-worthy finish.
How to Make Peanut Butter Rice Krispie Treats
Step 1: Melt the Butters Together
Start by grabbing a large pot and setting it over medium heat. Toss in the unsalted butter and creamy peanut butter, stirring gently as they melt and become smooth. This step will fill your kitchen with that mouthwatering aroma we all adore, setting the stage for maximum treat potential.
Step 2: Add and Melt the Marshmallows
Pour in your mini marshmallows and keep stirring. You want every last puff to melt into the buttery, peanutty mixture, transforming into a creamy, glossy base. Don’t rush—this step is key for smooth, chewy Peanut Butter Rice Krispie Treats.
Step 3: Flavor Punch
Remove the pot from the heat, then add vanilla extract and a pinch of salt. Stir until everything’s well mixed. Even just a hint of vanilla and salt takes this treat from tasty to totally irresistible.
Step 4: Fold in the Rice Krispies
Pour in all six cups of Rice Krispies and gently fold the cereal into the gooey mixture. Be patient—work carefully so every piece gets coated without losing that crispy crunch. Trust me, it’s worth taking your time here!
Step 5: Press and Cool
Quickly transfer the mixture to a greased or parchment-lined 9×13-inch pan. Use a spatula (or grease your hands lightly if you feel brave!) to press the mixture down evenly. Let the bars cool at room temperature for at least 30 minutes so they set perfectly before you dive in.
Step 6: Add Optional Toppings
Once cool, drizzle with melted chocolate or extra peanut butter for a crowd-pleasing finish. Slice into 16 squares and get ready to watch them disappear!
How to Serve Peanut Butter Rice Krispie Treats
Garnishes
Peanut Butter Rice Krispie Treats look even more inviting with a little finishing touch! A drizzle of melted chocolate brings classic candy bar vibes, while a second swirl of creamy peanut butter doubles down on the flavor. You can also sprinkle on chopped peanuts, flaky sea salt, or even mini chocolate chips for extra crunch and personality.
Side Dishes
These treats are sweet and rich, so they pair best with crisp apple slices, fresh berries, or a glass of cold milk. Set up a dessert platter with some fresh fruit and maybe a few salty pretzels—the balance will make these Rice Krispie bars even more snackable. For parties, add them alongside brownies or cookies for a crowd-pleasing treat tray.
Creative Ways to Present
Let the Peanut Butter Rice Krispie Treats steal the show: try cutting them into fun shapes with cookie cutters for birthday parties, stack them in towers for a bake sale centerpiece, or wrap individual squares in parchment and tie with twine for sweet homemade gifts. Personalized sprinkles or drizzle patterns make them special for any occasion!
Make Ahead and Storage
Storing Leftovers
To keep your Peanut Butter Rice Krispie Treats as fresh as possible, store them in an airtight container at room temperature. They’ll stay crisp and delicious for up to three days. Stack with parchment paper between layers if you need to save space and prevent sticking.
Freezing
Yes, you can absolutely freeze Peanut Butter Rice Krispie Treats! Once cut, wrap each square tightly in plastic wrap and place inside a freezer-safe bag or container. They’ll keep well for up to six weeks. To enjoy, let them thaw at room temperature for about an hour—just as chewy and wonderful as day one.
Reheating
If you love that ooey-gooey, fresh-made texture, pop a bar (unwrapped) in the microwave for about 5-8 seconds. It’ll soften up the marshmallow and make the treat slightly warm, just like it was freshly pressed. Just be careful not to overheat or it’ll get too sticky to handle!
FAQs
Why do my Rice Krispie Treats turn out hard?
If your treats are tough instead of chewy, you might have overcooked the marshmallow mixture or packed the mixture into the pan too firmly. For best results, melt everything just until combined and gently press the mixture into the pan rather than pressing down hard.
Can I use chunky peanut butter instead of creamy?
Absolutely! Using chunky peanut butter adds bits of real peanut throughout the treats for extra crunch and texture. Just be sure to stick with the same quantity and make sure it’s well blended so everything melts smoothly.
Are Peanut Butter Rice Krispie Treats gluten-free?
Most Rice Krispies cereal contains malt flavoring (which includes gluten), but there are certified gluten-free crispy rice cereals available. As long as you check your cereal and peanut butter labels, it’s easy to make this recipe completely gluten-free.
What else can I add to customize these treats?
Get creative! Stir in mini chocolate chips, chopped peanuts, crushed pretzels, or even colorful sprinkles after mixing in the cereal. Every batch can have its own twist, tailored to your cravings or celebration.
How do I keep the mixture from sticking to my hands?
Lightly grease your hands with butter or nonstick spray before pressing the warm mixture into the pan. If you prefer tools, use a silicone spatula or the back of a buttered spoon. No more sticky fingers—just perfect bars!
Final Thoughts
There’s something utterly delightful about sharing a pan of Peanut Butter Rice Krispie Treats—whether you’re making them for family, a bake sale, or just because you deserve a treat. Quick, crowd-pleasing, and packed with peanut buttery goodness, this is one recipe you’ll come back to again and again. Give it a try, and let the ooey-gooey nostalgia begin!
Print
Peanut Butter Rice Krispie Treats Recipe
- Total Time: 15 minutes (plus cooling)
- Yield: 16 squares 1x
- Diet: Vegetarian
Description
These Peanut Butter Rice Krispie Treats are a classic no-bake dessert that combines the creamy richness of peanut butter with the crispy texture of Rice Krispies. Perfect for a quick and easy sweet treat!
Ingredients
Ingredients:
- 3 tablespoons unsalted butter
- 1/2 cup creamy peanut butter
- 1 (10-ounce) bag mini marshmallows
- 6 cups Rice Krispies cereal
- 1/2 teaspoon vanilla extract
- Pinch of salt
- Optional Topping: melted chocolate or extra peanut butter drizzle
Instructions
- In a large pot over medium heat, melt the butter and peanut butter together, stirring until smooth. Add the mini marshmallows and stir continuously until fully melted and combined.
- Remove from heat and stir in vanilla extract and a pinch of salt. Immediately add the Rice Krispies cereal and gently fold until evenly coated.
- Press the mixture into a greased or parchment-lined 9×13-inch pan using a spatula or lightly greased hands.
- Let cool at room temperature for at least 30 minutes before cutting into squares. Drizzle with melted chocolate or extra peanut butter if desired.
Notes
- For extra flavor and texture, mix in 1/2 cup of mini chocolate chips or chopped peanuts after the cereal is added.
- Use natural peanut butter for a less sweet version, but make sure it’s well stirred and smooth.
- Prep Time: 10 minutes
- Cook Time: 5 minutes
- Category: Dessert
- Method: No-Bake
- Cuisine: American
Nutrition
- Serving Size: 1 square
- Calories: 180
- Sugar: 12g
- Sodium: 105mg
- Fat: 7g
- Saturated Fat: 2g
- Unsaturated Fat: 5g
- Trans Fat: 0g
- Carbohydrates: 27g
- Fiber: 1g
- Protein: 3g
- Cholesterol: 5mg


