
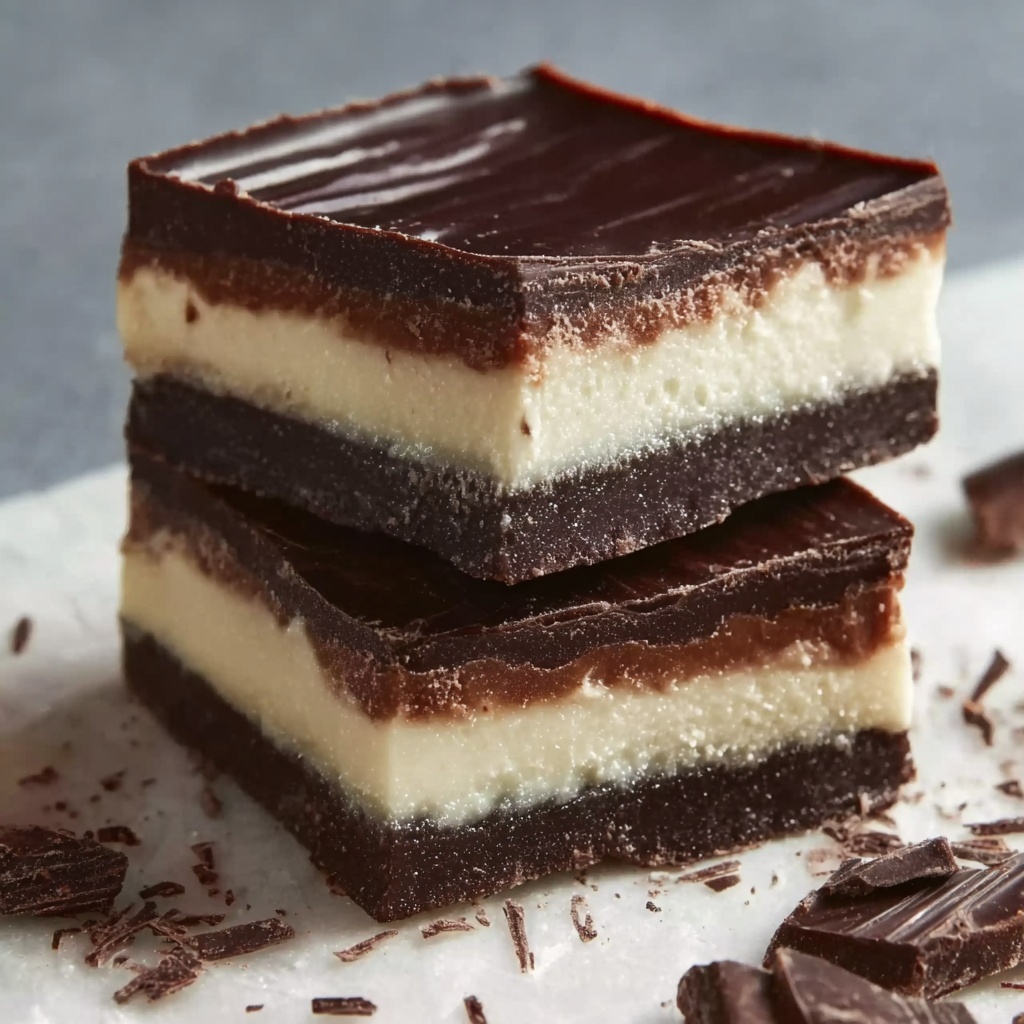
If you have a soft spot for creamy, indulgent sweets, the Boston Cream Fudge Recipe will become your new go-to treat. Combining the luscious flavors of rich white chocolate, smooth marshmallow cream, and a swirl of cocoa, this fudge manages to capture the essence of a classic Boston cream pie in a delightfully bite-sized candy. Every piece offers an irresistible contrast of velvety texture and chocolatey goodness, making it perfect for sharing or savoring all by yourself.
Ingredients You’ll Need
These ingredients are straightforward but play a crucial role in creating that perfect fudgy texture and balanced flavor. Each component adds its own magic, from the creamy butter to the sweet vanilla, resulting in a dessert that’s as simple to make as it is delightful to eat.
- 2 cups granulated sugar: The essential sweet base that crystallizes into fudge’s irresistible texture.
- 3/4 cup unsalted butter: Adds richness and a smooth mouthfeel without overpowering sweetness.
- 2/3 cup heavy cream: Ensures the fudge remains creamy and soft, preventing dryness.
- 1/4 cup light corn syrup: Keeps the sugar from crystallizing for that silky consistency.
- 6 ounces white baking chocolate, chopped: Brings a creamy, mellow vanilla flavor and smoothness.
- 7 ounces marshmallow cream: Adds a light, fluffy sweetness and helps with the fudge’s tender texture.
- 1 teaspoon vanilla extract: Elevates all other flavors with a warm, familiar aroma.
- 1 1/2 tablespoons unsweetened cocoa powder, sifted: Introduces a subtle chocolate swirl with balanced bitterness.
- 1 cup semi-sweet chocolate chips: For dipping, adding a glossy and slightly crunchy chocolate shell.
- 1 1/2 tablespoons vegetable oil: Used to melt the chocolate chips smoothly for dipping.
How to Make Boston Cream Fudge Recipe
Step 1: Prepare Your Pan
Start by lining an 8×8-inch baking pan with parchment paper, leaving a generous overhang. This will make it much easier to lift the fudge out once set. Lightly coat the parchment with nonstick spray to prevent sticking, ensuring clean, perfect squares when you slice.
Step 2: Combine and Cook the Fudge Base
In a heavy saucepan, combine the granulated sugar, butter, heavy cream, and light corn syrup. Keep the heat at medium and stir constantly as the mixture heats to prevent burning. When it reaches a steady rolling boil, continue stirring for 4 to 5 minutes until the temperature hits between 235 and 240°F—that’s the magic point that ensures the fudge has the perfect consistency while cooling.
Step 3: Add White Chocolate and Marshmallow Cream
Remove the pan from heat and immediately stir in the chopped white baking chocolate until it’s fully melted and silky smooth. Next, mix in the marshmallow cream and vanilla extract. This combination creates the luscious white layer that’s the signature of the Boston Cream Fudge Recipe, ensuring each bite is soft and rich.
Step 4: Create the Two-Tone Layers
Pour approximately three-quarters of your white mixture into the prepared pan, spreading it evenly. To the remaining mixture, whisk in the sifted cocoa powder until smooth. Carefully spoon this chocolate layer over the white base in the pan, then use a toothpick to gently swirl the layers together. This beautiful marbling makes the fudge visually stunning and creates a perfect harmony of flavors.
Step 5: Chill and Set
Allow the fudge to cool at room temperature for about an hour. Then move it to the refrigerator for another hour to fully set and firm up, making it easier to cut into neat squares.
Step 6: Cut and Dip the Fudge
Using the parchment overhang, lift the fudge out of the pan and place it on a cutting board. Slice into roughly 25 squares. Next, melt the semi-sweet chocolate chips with the vegetable oil in the microwave in short intervals, stirring to keep the chocolate glossy and smooth. Dip the top of each fudge square into the melted chocolate and let them set completely—this adds a shiny finish and an extra layer of decadent chocolate flavor.
How to Serve Boston Cream Fudge Recipe

Garnishes
You can make your Boston Cream Fudge extra special by dusting a bit of cocoa powder or finely chopped toasted nuts on top before the chocolate sets. A sprinkle of sea salt also works wonders to balance the sweetness and add a touch of sophistication.
Side Dishes
This fudge pairs beautifully with a cup of robust coffee or a warm mug of hot chocolate. The bitterness of these drinks complements the sweet, creamy nature of the fudge and rounds out the dessert experience perfectly.
Creative Ways to Present
For an impressive presentation, arrange the fudge squares on a vintage serving tray lined with doilies or colorful parchment paper. You might even layer the fudge between sheets of wax paper in a decorative tin if giving it as a gift—the perfect way to share the joy of this Boston Cream Fudge Recipe.
Make Ahead and Storage
Storing Leftovers
Boston Cream Fudge holds up very well when stored in an airtight container. Keep it at room temperature if you plan to eat it within a few days, or refrigerate if you want it to last about a week. Proper storage helps retain the fudge’s moisture and silky texture.
Freezing
If you want to save Boston Cream Fudge for longer, wrap each square individually in wax paper and place them in a freezer-safe container. Frozen fudge can last up to 3 months and thaw quickly at room temperature without losing any of its delicious qualities.
Reheating
Reheating fudge isn’t typically necessary, but if you want a softer bite, let it come to room temperature. Avoid microwaving since it can cause the fudge to lose its consistency. A gentle warm-up in your hand or a brief counter sit-out is usually enough to soften it slightly.
FAQs
Can I use dark chocolate instead of semi-sweet for dipping?
Absolutely! Dark chocolate will add a deeper, more intense flavor contrast to the sweet fudge. Just be sure to balance the bitterness with your preferred sweetness level in the fudge itself.
Is it necessary to use marshmallow cream in this Boston Cream Fudge Recipe?
Marshmallow cream adds a unique fluffiness and smooth texture that’s hard to replicate and is key to this recipe’s signature softness. However, if you don’t have it, you might try substituting with marshmallow fluff or a homemade marshmallow mixture.
Why do I need to cook the mixture to a specific temperature?
Cooking to 235–240°F ensures the sugar concentration is just right for fudge, giving it that perfect balance between softness and firmness. Too low, and it may not set properly; too high and it can become too hard or grainy.
Can I make this fudge gluten-free?
Yes! All ingredients in the Boston Cream Fudge Recipe are naturally gluten-free, but always double-check labels, especially on items like marshmallow cream or chocolate, as manufacturing processes vary.
How long does it take for the fudge to fully set?
The fudge needs about one hour at room temperature and an additional hour in the fridge. This timing helps the layers harden enough to cut and ensures the chocolate dip sets perfectly for serving.
Final Thoughts
Now that you have the full scoop on this luscious Boston Cream Fudge Recipe, I encourage you to dive in and make some magic in your kitchen. It’s a fun project that yields a truly soul-satisfying treat, perfect for special occasions or just a little everyday indulgence. Your friends and family are going to ask for the recipe, and you’ll love sharing this timeless, creamy delight.
Print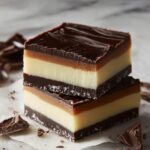
Boston Cream Fudge Recipe
- Prep Time: 20 minutes
- Cook Time: 15 minutes
- Total Time: 2 hours 30 minutes
- Yield: 25 servings
- Category: Dessert
- Method: Stovetop
- Cuisine: American
Description
Indulge in a luscious homemade Boston Cream Fudge featuring a creamy white chocolate base layered with rich cocoa chocolate, finished with a glossy melted chocolate topping. This classic fudge recipe delivers a perfect balance of sweet, creamy, and chocolate flavors with a delightful swirl effect, ideal for special occasions or sweet treats.
Ingredients
White Chocolate Layer
- 2 cups granulated sugar
- 3/4 cup unsalted butter
- 2/3 cup heavy cream
- 1/4 cup light corn syrup
- 6 ounces white baking chocolate, chopped
- 7 ounces marshmallow cream
- 1 teaspoon vanilla extract
Chocolate Layer and Topping
- 1 1/2 tablespoons unsweetened cocoa powder, sifted
- 1 cup semi-sweet chocolate chips
- 1 1/2 tablespoons vegetable oil
Instructions
- Prepare Pan: Line an 8×8-inch baking pan with parchment paper, leaving an overhang on the sides for easy removal, and lightly coat it with nonstick spray to prevent sticking.
- Cook Sugar Mixture: In a heavy saucepan over medium heat, combine sugar, unsalted butter, heavy cream, and light corn syrup. Stir constantly and bring the mixture to a rolling boil to dissolve the sugar and blend the fats.
- Boil to Soft-Ball Stage: Continue stirring and boiling the mixture for 4 to 5 minutes until it reaches a temperature between 235°F and 240°F, which corresponds to the soft-ball stage for fudges, ensuring proper texture formation.
- Add White Chocolate and Flavorings: Remove the pan from heat. Stir in chopped white baking chocolate until fully melted and smooth, then fold in marshmallow cream and vanilla extract until the mixture is homogenous.
- Pour White Layer: Pour about three-quarters of the white chocolate mixture into the prepared baking pan, spreading it evenly to form the base layer.
- Prepare and Add Cocoa Layer: To the remaining one-quarter of the mixture, add sifted unsweetened cocoa powder. Whisk thoroughly until smooth and uniform. Spoon this chocolate mixture over the white layer and gently swirl together using a toothpick to create a marbled effect.
- Set Fudge: Allow the fudge to cool at room temperature for 1 hour so it begins to firm up. Then refrigerate for an additional hour to fully set and solidify the texture.
- Cut Fudge: Once set, use the parchment paper overhang to lift the fudge out of the pan. Place on a cutting board and cut into 25 square pieces for serving.
- Melt Chocolate Topping: In a microwave-safe bowl, combine semi-sweet chocolate chips and vegetable oil. Microwave in short intervals, stirring between each, until the chocolate is completely melted and smooth.
- Dip and Finish: Dip the top of each fudge square into the melted chocolate to coat, then place on parchment paper and allow the topping to set before serving for a glossy finish.
Notes
- Use a candy thermometer to accurately measure the temperature for perfect fudges.
- Allow fudge to cool properly before cutting to prevent crumbling.
- Sifting cocoa powder prevents lumps in the chocolate layer.
- Swirling should be gentle to maintain distinct marbled layers.
- Melt chocolate topping carefully to avoid overheating and burning.


